— Blog · 27 October 2026 · 4 min read
game room planning made simple: your practical place to start
A practical starting guide for planning a game room, from priorities and layout to timings, professional input and the key decisions to lock in before work begins.
Start with how the room will really be used
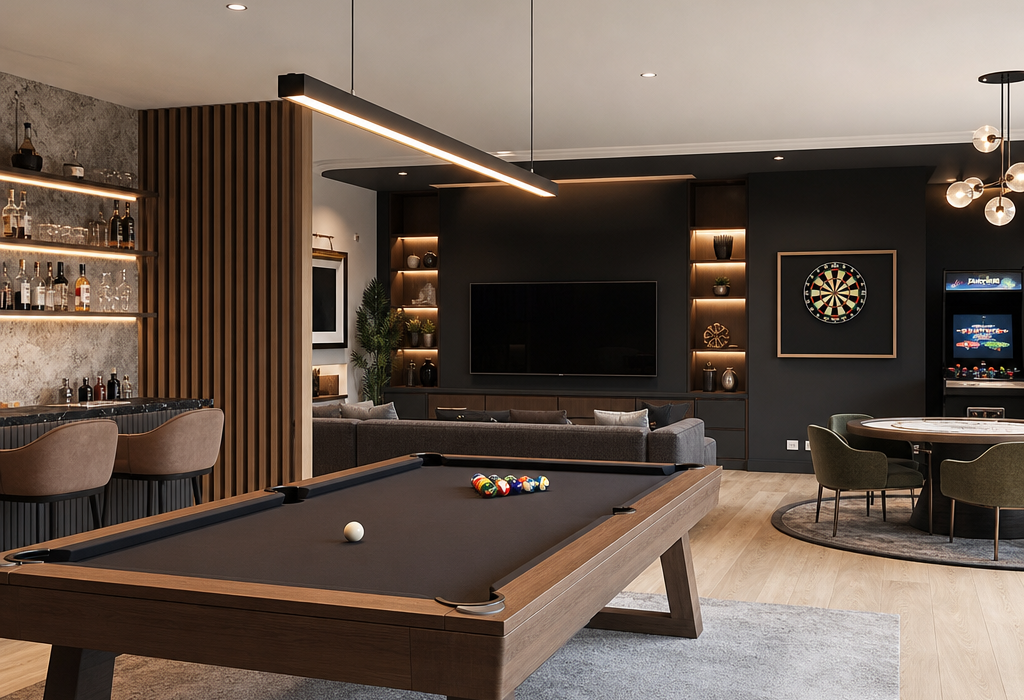
Before you think about finishes, decide what the game room must do on an average week. Will it be mainly for board games, console gaming, pool, darts, home cinema nights, or a bit of everything? Make a short list of the people who will use it, the ages involved, and the usual habits that matter: quiet seating, space for a table, storage for controllers, or room for a larger screen. In a contemporary game room, the best plans usually start with the activity mix, because that tells you how much floor space, seating and storage you need.
It also helps to note what the room is not for. If it must double as a spare room, home office or utility overflow, those rules will shape the layout far more than any style choice. Be honest about noise, mess and how often the space will be used, because that will guide materials, lighting and furniture from the start.
Work out your priorities before you draw the layout
List your non-negotiables first, then the nice-to-haves. For many households, the essentials are comfortable seating, robust surfaces, dimmable lighting and enough storage to keep games out of sight when not in use. If you are fitting a pool table or a large gaming setup, check the room size early and allow clear circulation around it rather than squeezing it in afterwards.
Think about the details that affect everyday use, such as power sockets, internet access, acoustic treatment and ventilation. A contemporary approach works well here because it favours clean lines, practical built-ins and clutter-free storage. If the room will be used late in the evening, plan for layered lighting: ceiling light for general use, task lighting near tables, and softer lamps or LED strips for atmosphere without glare on screens.
Plan a realistic timeline in phases
Start with an ideas phase for measuring, sketching and collecting references. Then move into the layout stage, where you decide furniture positions, storage zones, lighting points and cable routes. After that comes the specification phase, when you choose finishes, joinery, flooring, paint colours and any specialist items such as a projector, blackout blind or gaming desk.
If the room needs building work, allow time for design, procurement and installation separately. Even a straightforward refurb can slow down if you are waiting on flooring, bespoke joinery or equipment. A sensible sequence is: measure and plan, confirm the budget, finalise the layout, order long-lead items, then schedule the work. Keeping the steps separate avoids having to rethink the room halfway through.
Know when to bring in a professional
You may be able to plan a simple makeover yourself, but a professional becomes valuable when the project affects electrics, lighting design, joinery, structural changes or awkward proportions. If you want built-in storage, a home bar, acoustic upgrades or a hidden media wall, a designer or joiner can help avoid expensive mistakes and make the room feel considered rather than crowded.
It is also worth involving a professional if the room has low ceilings, limited natural light or an unusual shape, because those issues change how a game room performs in practice. A good plan should balance style with everyday comfort, and a contemporary scheme often benefits from precise detailing: flush cabinetry, concealed cabling and simple finishes that keep the room calm when the games are packed away.
Lock the key decisions before any work starts
Before the first day on site, confirm the room’s exact purpose, the fixed furniture sizes, the electrical plan, the lighting positions and the storage strategy. Decide where cables will run, where wall-mounted screens or shelving will sit, and whether you need flooring that can handle heavy furniture, rolling chairs or the odd dropped drink. At this stage, also finalise your finish choices, because changing paint, flooring or joinery details mid-project can delay everything else.
Measure the room again with the chosen items in mind, including door swings, opening drawers and chair pull-back space. If the game room is to feel contemporary, keep the palette disciplined and the surfaces practical: hard-wearing flooring, wipe-clean paint, and a mix of open and closed storage. Once those decisions are fixed, the project becomes much easier to manage and far more likely to feel purposeful when it is finished.
Find top professionals for your game room project
Free and with no obligation / Takes under 5 minutes
Are you an architect or designer? Register for free! »