Panels
Assembly
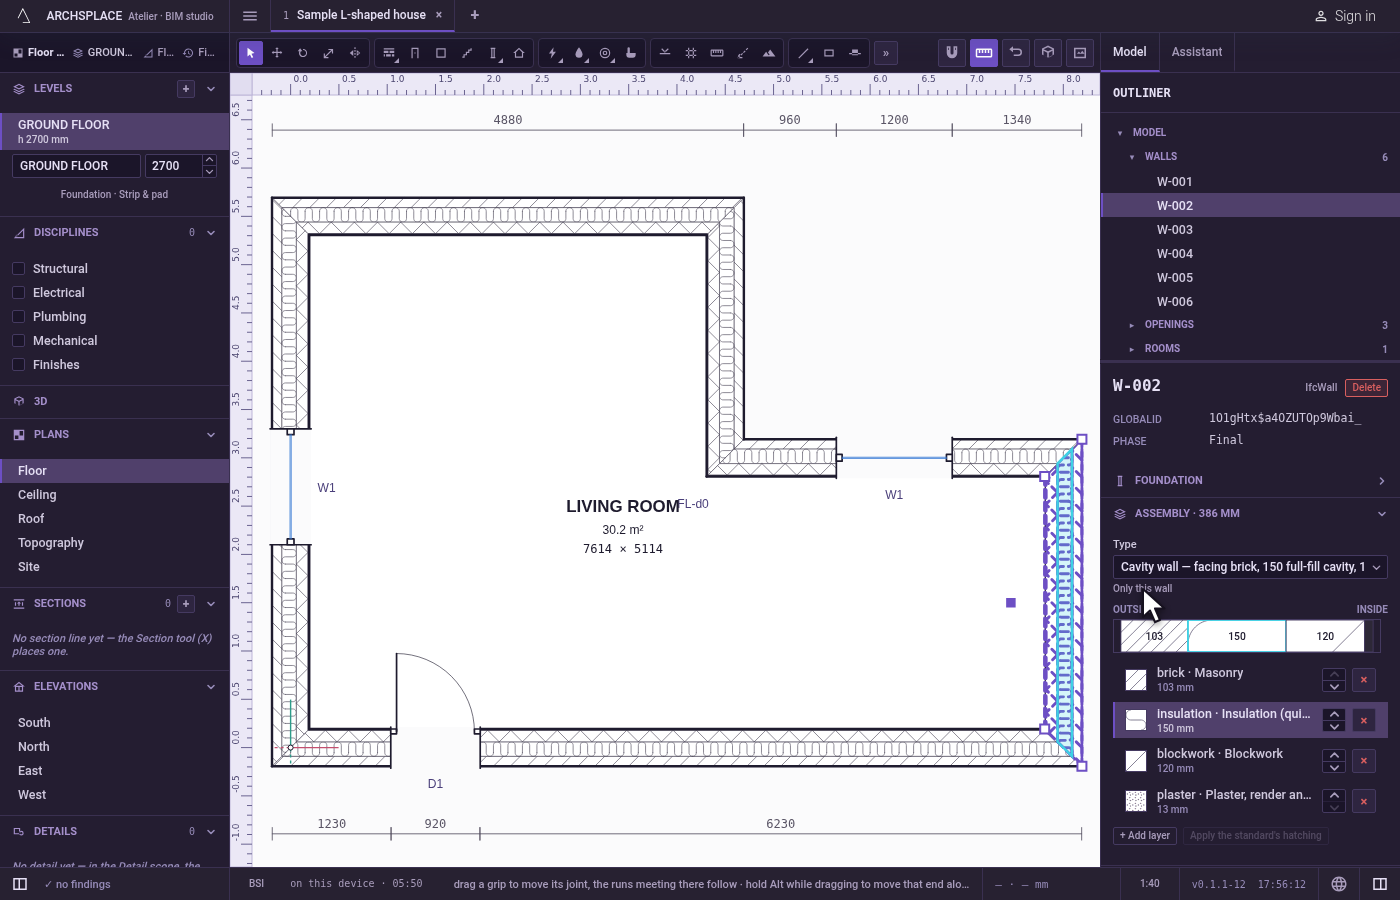
The assembly is the build-up of a wall type or a slab type: its layers from one face to the other, each with its material, its thickness and the hatch it is cut with. An edit changes the type itself, so every wall or floor of that type follows it in one step, and Duplicate type gives one element a copy of its own first.
What it is
The assembly is the first section of a wall's panel, titled Assembly and the wall's total thickness, such as Assembly · 360 mm. The same editor stands in a floor's panel for its slab type, from Walking surface to Soffit, and in the foundation's panel for its footings.
From top to bottom it shows:
- Type: the wall type the wall stands on, chosen in a list of the project's types. Under it, how many walls share it, such as Shared by 6 walls, or Only this wall, and, when it is shared, Duplicate type.
- Outside and Inside over a strip that draws the layers side by side, each in its hatch, as the plan cuts it, with its thickness when there is room. A click on a band lights its layer.
- The layers, one row each, from the outside face to the inside one: a swatch of its hatch, its material and its hatch, its thickness, two arrows that move it out or in, and a × that removes it. A click on a row opens its fields: Layer material, Layer thickness in millimetres, Cut pattern and, by the cut, Layer colour for a solid, Rotation (°) and Scale for a pattern laid along the wall, with Edit tile and New, which opens the tile editor on a new drafting hatch.
- + Add layer, which adds a layer of plasterboard under the one open, and Apply the standard's hatching, which gives every layer with no hatch, or one the template lacks, the hatch the standard gives its material.
A material chosen takes the hatch the template gives it. In Cut pattern, the hatch the standard gives the layer's material is marked standard.
Every edit is a draft first: a bar under the layers says Changes not applied, with Discard and Apply, or Apply to 6 walls when the type is shared. Applying writes the new build-up onto the type, so every wall of it changes in one step. Duplicate type first gives this wall a copy of the type of its own, and its hover says that the other walls keep theirs.
When to use it
- Changing the thickness of a layer, such as more insulation on every external wall.
- Adding a layer, such as a lining on the inside.
- Changing the hatch a layer is drawn with in plans and sections.
- Giving one wall a build-up of its own.
The steps
Select a wall. Click an external wall. Its panel opens on Assembly, its type and Shared by 6 walls under it.
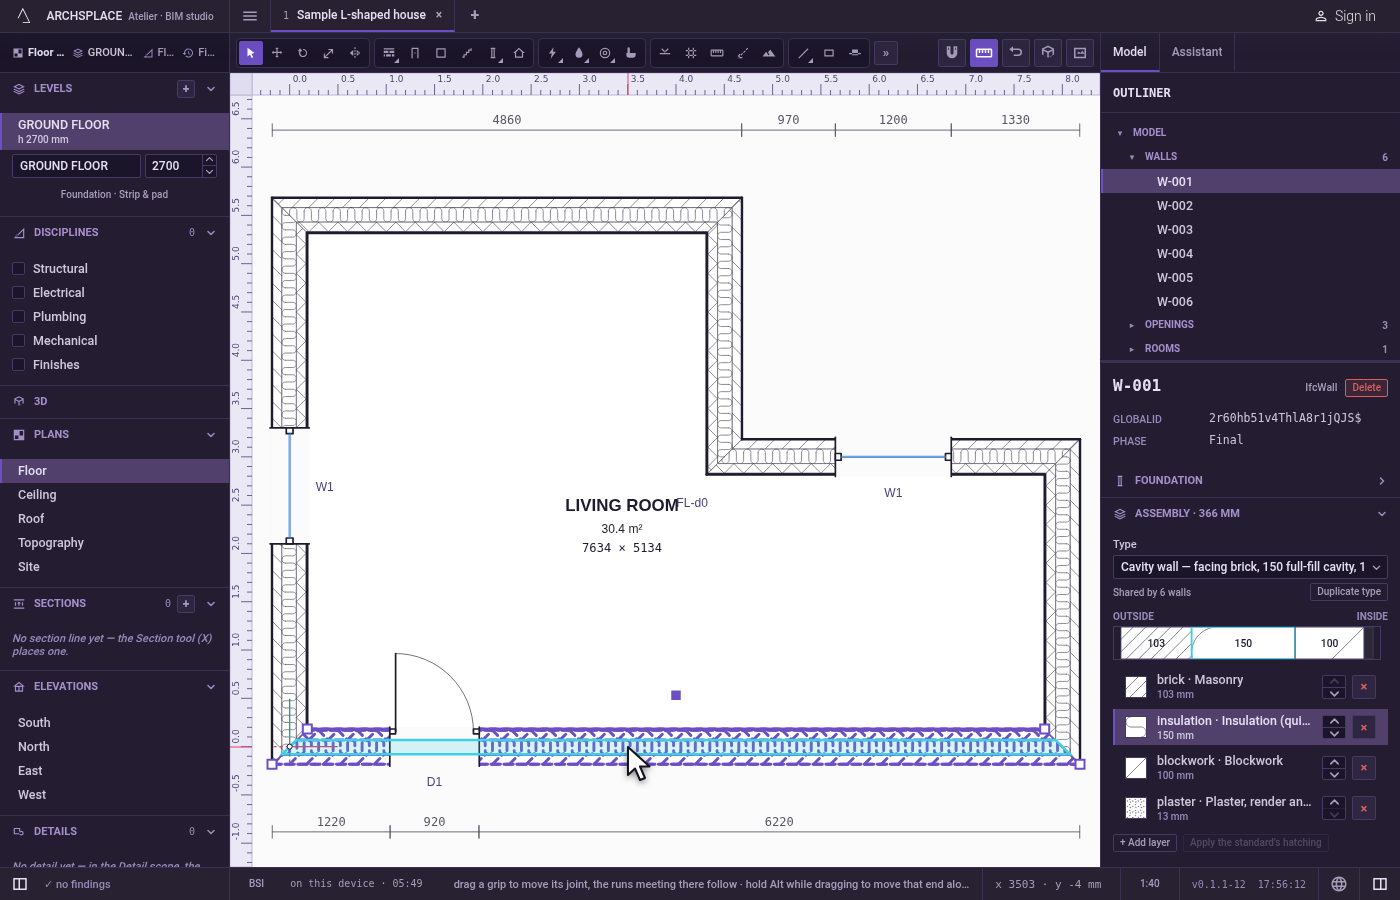
Open the insulation layer. Click the insulation's row. Its fields open under it.
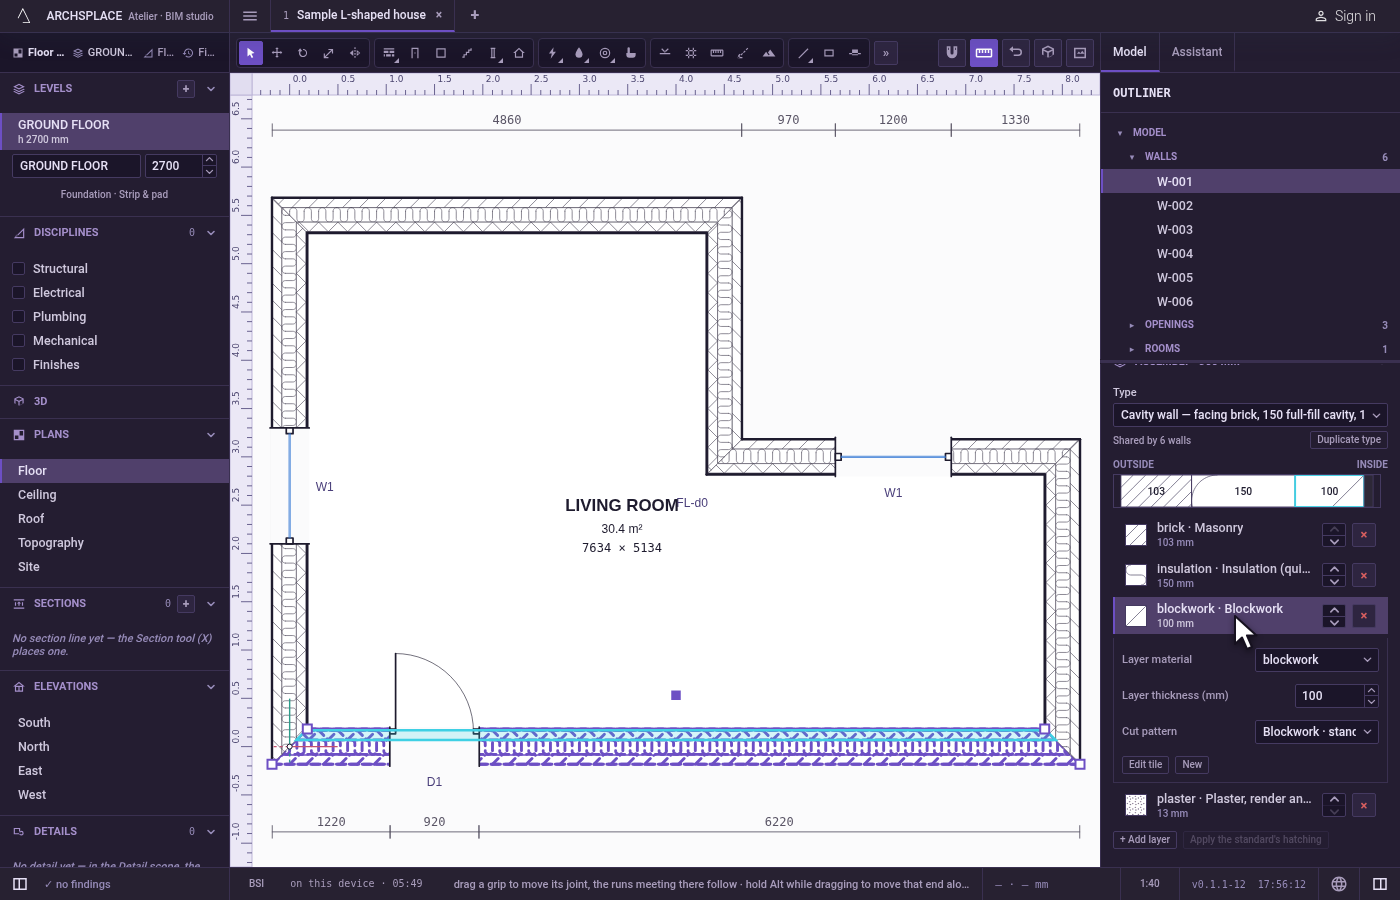
Thicken it. In Layer thickness, type 120 and press
Enter. The strip widens the layer, and the bar Changes not applied appears.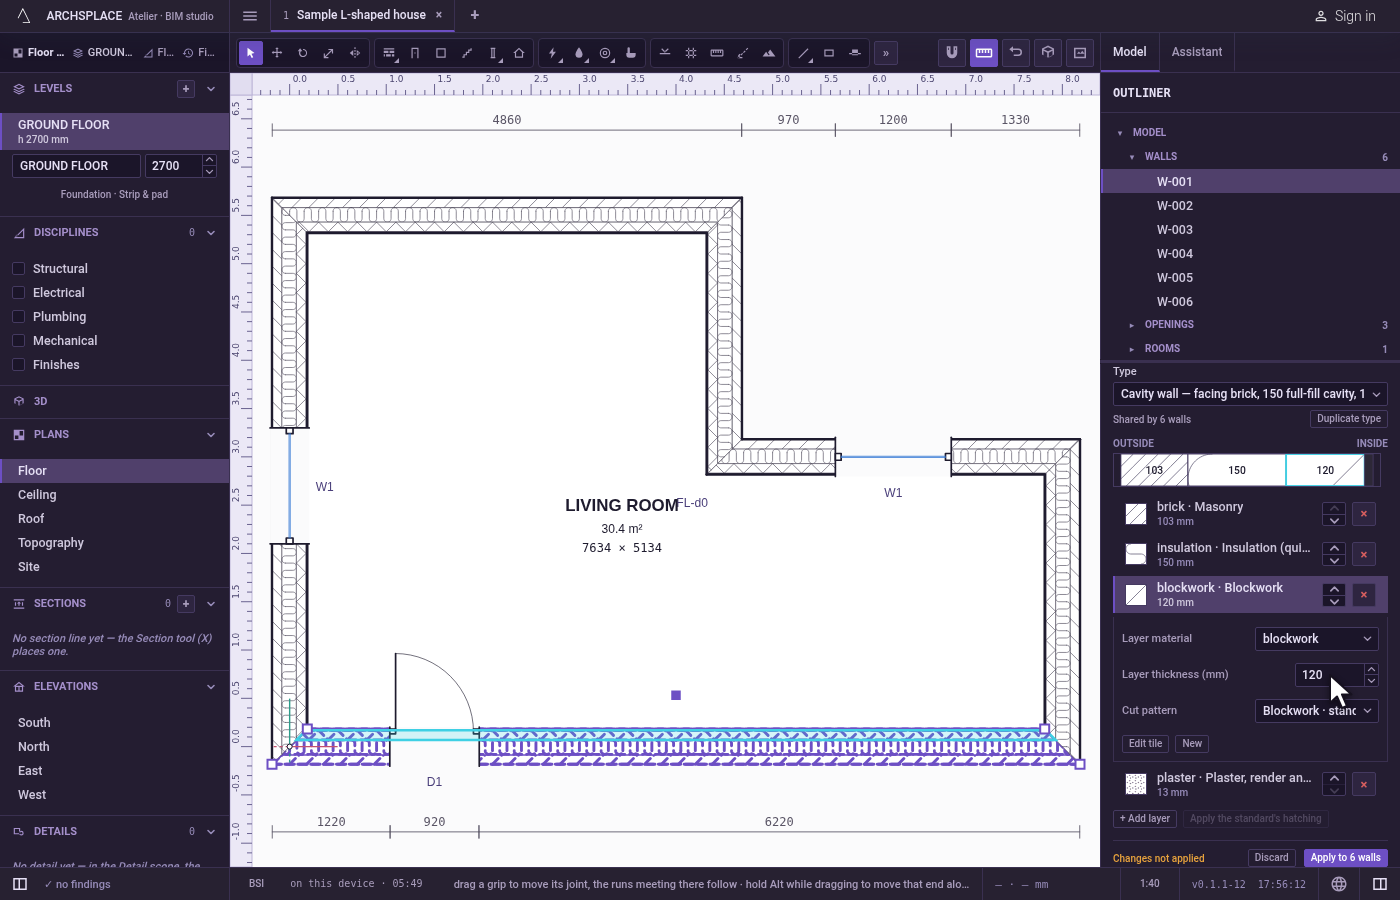
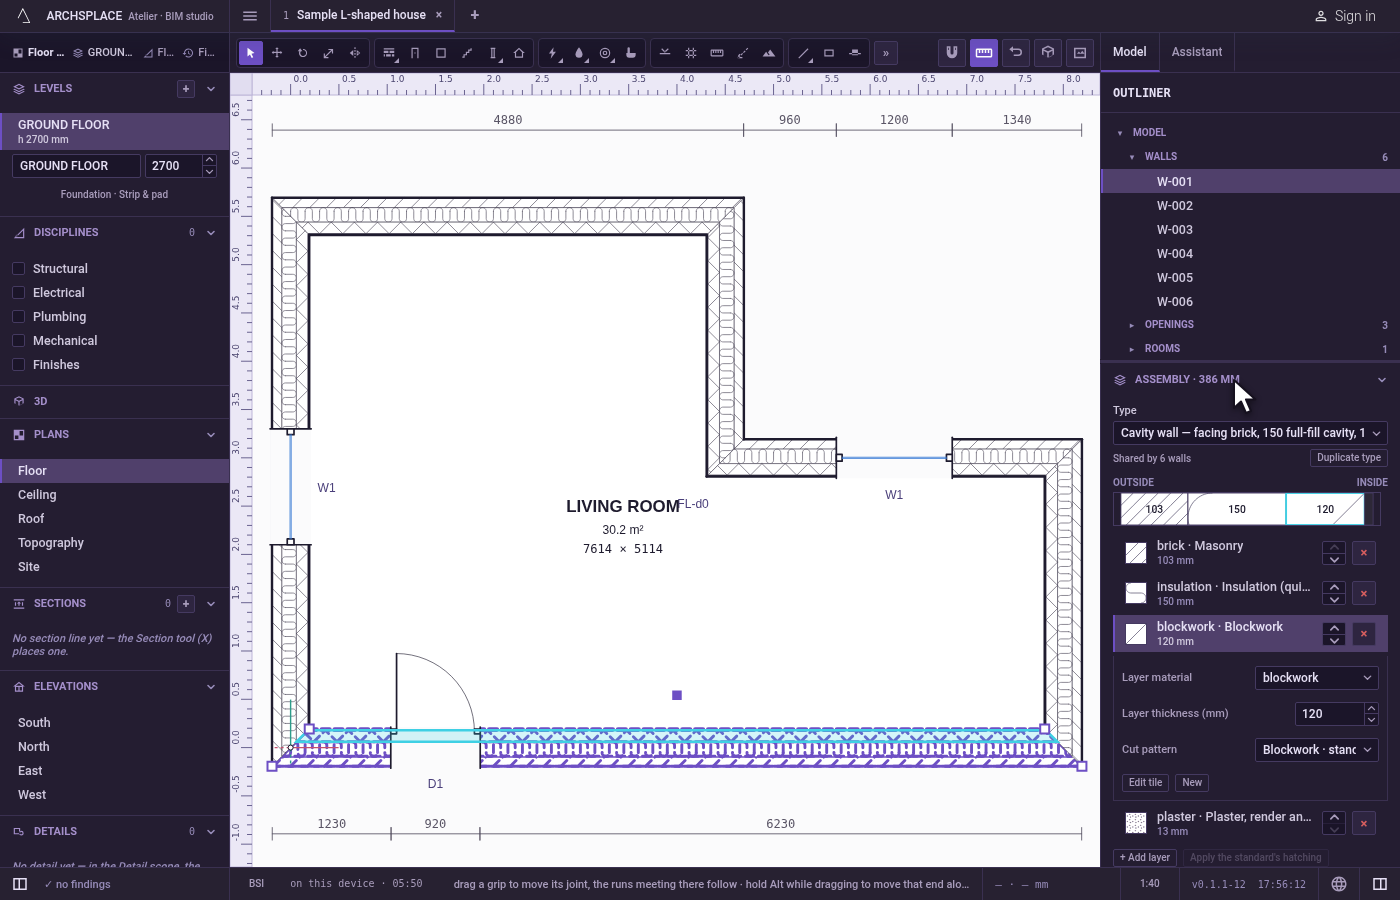
Apply to every wall of the type. Click Apply to 6 walls. The six walls thicken on the plan, and Assembly's title gives the new total.
Give one wall its own type. Select another wall of that type and click Duplicate type. The wall now stands on a copy, Only this wall, and its edits reach it alone.
What it refuses
- Removing the last layer. With one layer left, its × is greyed.
- A thickness under 1 mm. The field does not take it.
- A scale of 0 or less for a layer's pattern.
- Changes not applied. Nothing reaches the walls until Apply; Discard forgets them.
What it writes to the contract
Apply writes the type's whole build-up into the project's wallTypes (or slabTypes), under the type's key: each layer with its material, its thickness in metres, and its pattern when it is not the plain poché, with color for a solid and rotation and scale for a pattern laid along the wall. A type of the template is written into the project under its own key, with its name and use, which overrides it for this project only. On the international template, the cavity wall's insulation thickened to 120 mm reads:
A type whose key carries its thickness takes its new total in its key and its name. Type writes the wall's type, and Duplicate type writes a copy under the type's key followed by _COPY, named as a copy, which the wall's type then names. A project type no wall uses any more leaves the project. Each of these is one step that one Ctrl+Z takes back.
Common questions
If I edit a wall's layers, do the other walls change too?
Yes, every wall of the same type does: the edit is written onto the type, the way Revit edits a type. The Apply button says how many walls it reaches. To change one wall alone, click Duplicate type first: that wall gets a copy of its own and the others keep theirs.
How do I change the hatch of a layer?
Click the layer's row to open it and choose another hatch in Cut pattern: a drafting hatch of the template, a solid colour, or the plain poché. The hatch the standard gives that material is marked standard.
Why do my changes not show on the plan?
Because they are a draft until you apply them: the bar under the layers says Changes not applied. Click Apply, or Discard to go back.