PlanVLPMin the studio
Foundation editor
The foundation editor redraws a level's footings by hand: strip foundations drawn point to point along their axis, pad foundations placed one by one, and the usual editing tools to move, copy, rotate, mirror, offset, trim, extend and fillet them. Everything you do is a draft, and only Done hands it to the model, which checks it before writing.
What it is
A level's foundation starts generated from its walls and columns: a strip foundation under every load-bearing wall and a pad foundation under every column. The foundation editor is where you take that over and draw the footings yourself. It opens on the Topography plan, the foundation plan, with the rest of the drawing stepped back, and starts from the foundation as it stands, so nothing changes until you change it.
Inside, every strip foundation is drawn as its strip over its dashed axis, every corner of an axis is a dot, the middle of every leg carries a diamond, and every pad foundation is a square. What the pointer is over grows and lights up, and what you hold turns orange. A bar at the foot of the plan names the foundation, says live what Done would write, so many strip and so many pad foundations, or the first thing that would stop it, and holds Done ⏎, with Cancel once you have changed something.
The toolbar holds the editor's tools:
- Select (
V) takes a corner, a strip foundation or a pad foundation, and drags it. A corner brings every corner standing on the same point, so a joint stays a joint. Dragging a diamond bows its leg into an arc; clicking it adds a corner there. - Strip foundation (
L) draws an axis point to point, withAfor an arc,Lback to straight lines,Cto close it andEnterto end it. - Pad foundation (
P) drops a pad foundation where you click. - Move (
M), Copy (CO), Rotate (RO), Mirror (MI), Offset (OF), Trim (TR), Extend (EX) and Fillet (FIL) work on the axes as they do in every editor, each leg keeping its own numbers as it moves.
Every gesture takes a typed value while it runs: a distance along the pointer such as 2.5, a point x;y, a step from the last point @dx;dy, or a distance and an angle @2.5<90. The value is drawn where it would land before Enter lands it, and Esc drops what you typed, then the gesture. The editor keeps its own history: Ctrl+Z and Ctrl+Y step through your changes, and nothing reaches the model before Done.
When to use it
- Adding a footing where no wall stands, such as under a future terrace.
- Joining two footings, cutting one short, or rounding a corner of a curved wall's footing.
- Giving one footing its own width, depth or bearing level, or stepping it with the ground.
- Placing pad foundations where the structure needs them.
The steps
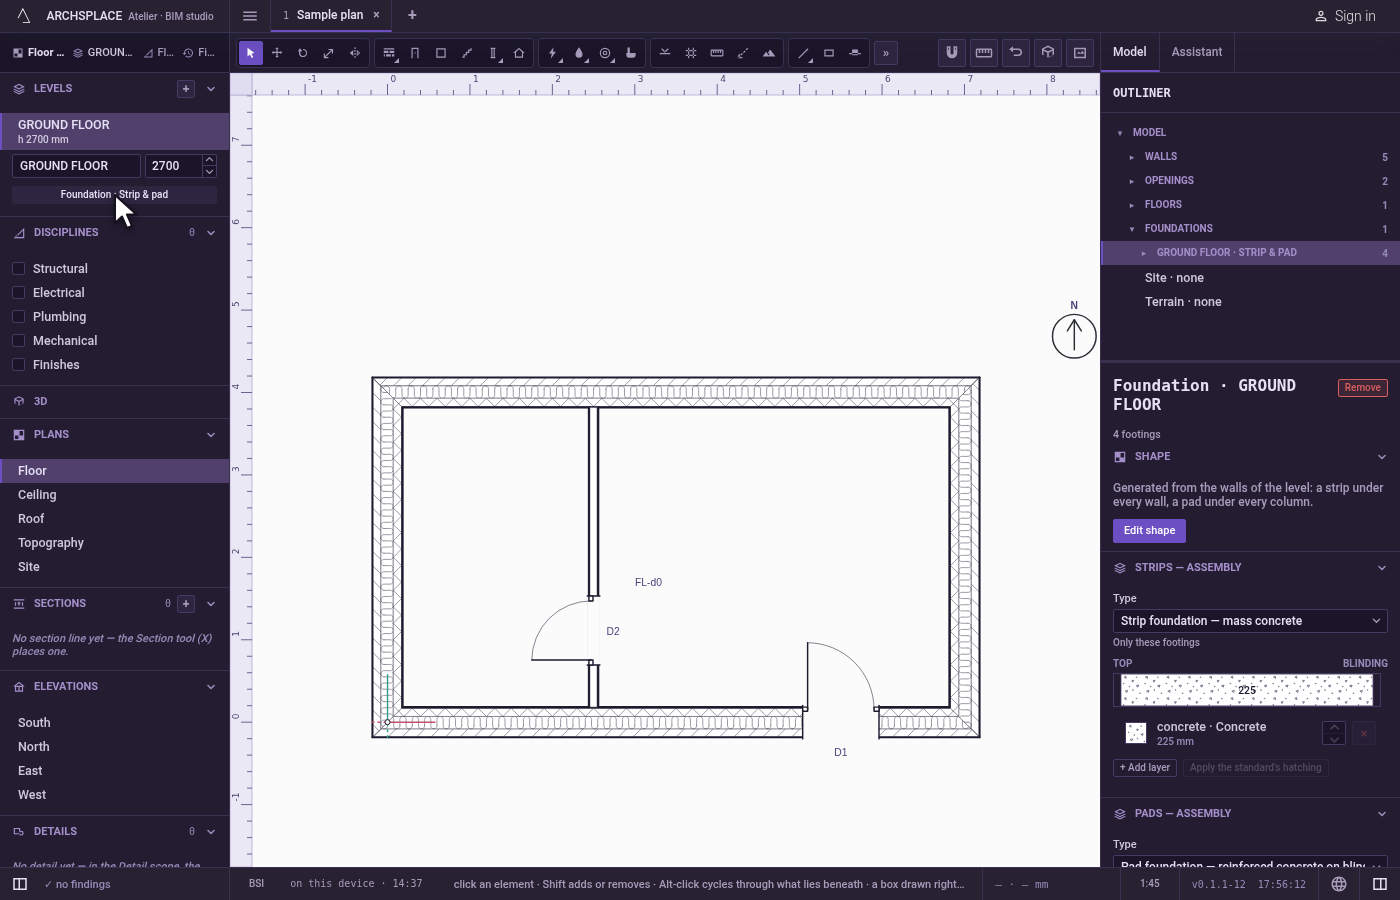
Found the level. In the sidebar, with the level open, click Foundation · Strip & pad, the foundation button of the level (a level with no foundation offers Add a foundation to this level in its place, and that button makes one the same way). The foundation is selected; its panel reads Foundation with the level's name, and its shape is generated from the walls of the level.
Open the editor. Click Edit shape in the panel. You can also double-click a footing on the plan or in the 3D, or press
Enterwith the foundation selected. The plan turns to Topography, and the footings are drawn as a draft.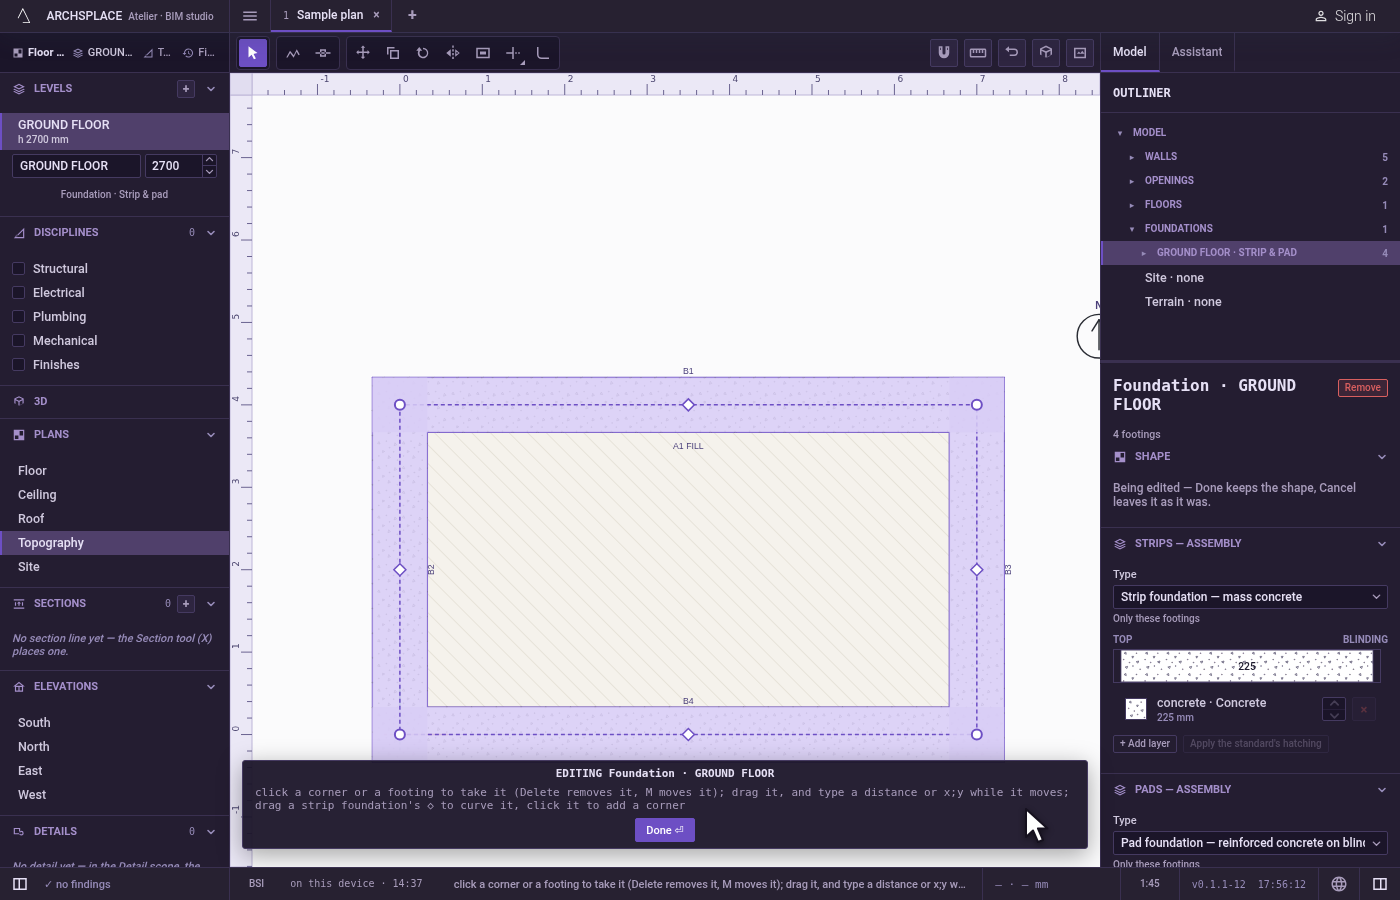
Draw a strip foundation. Press
L. Click the first point of the axis, then type@and the leg's east and north lengths in the project's units, such as@4;0for a leg to the east, and pressEnter, then click a third point. PressEnterto end the axis. The new footing takes the level's width and depth.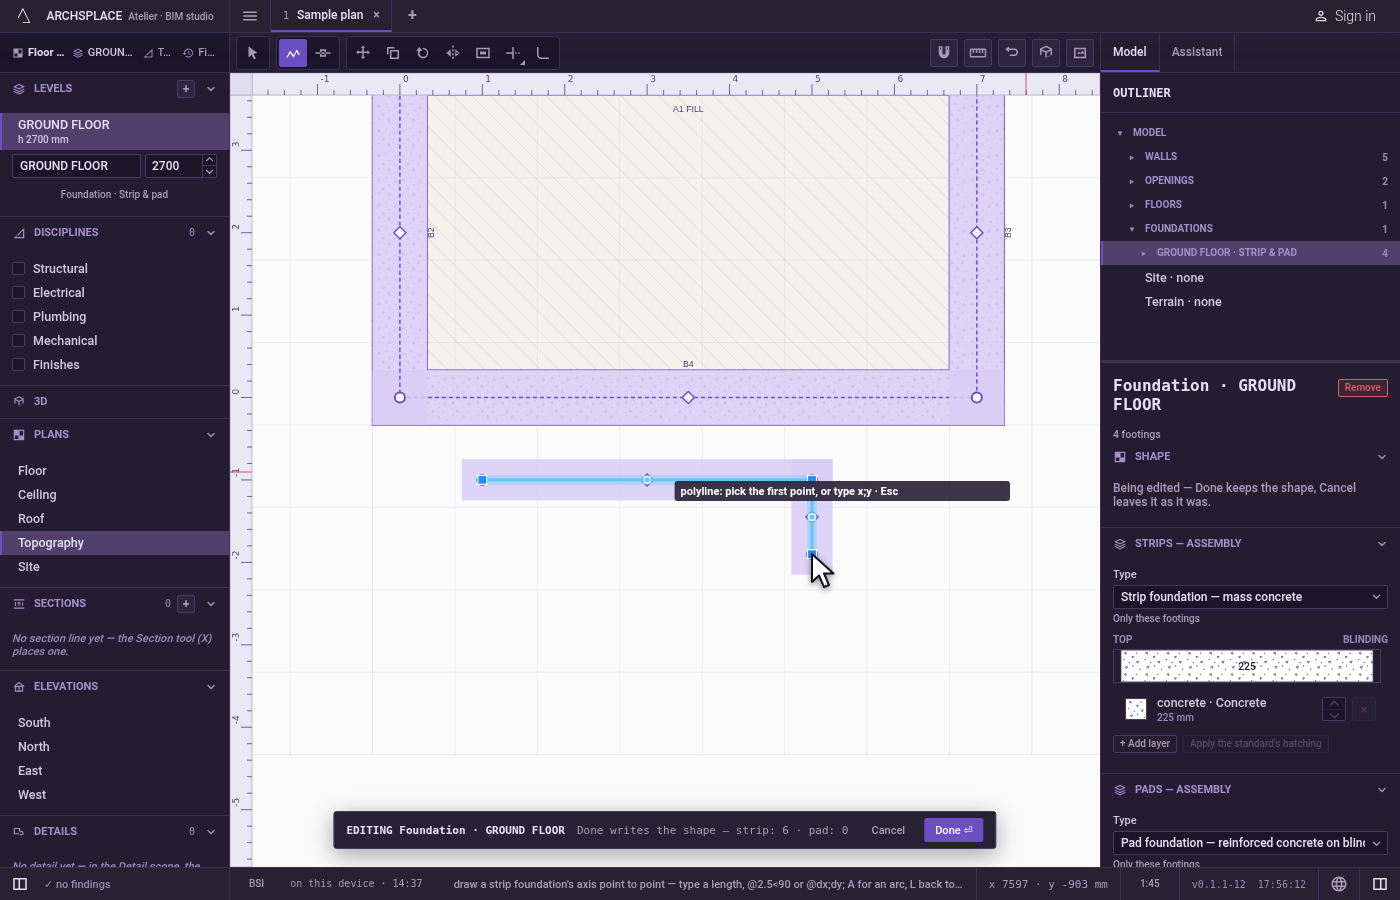
Place pad foundations. Press
Pand click where a pad foundation stands, or typex;yand pressEnter. Type@and the offset from the last one, such as@3;0for one to the east of it, and pressEnterto drop the next one.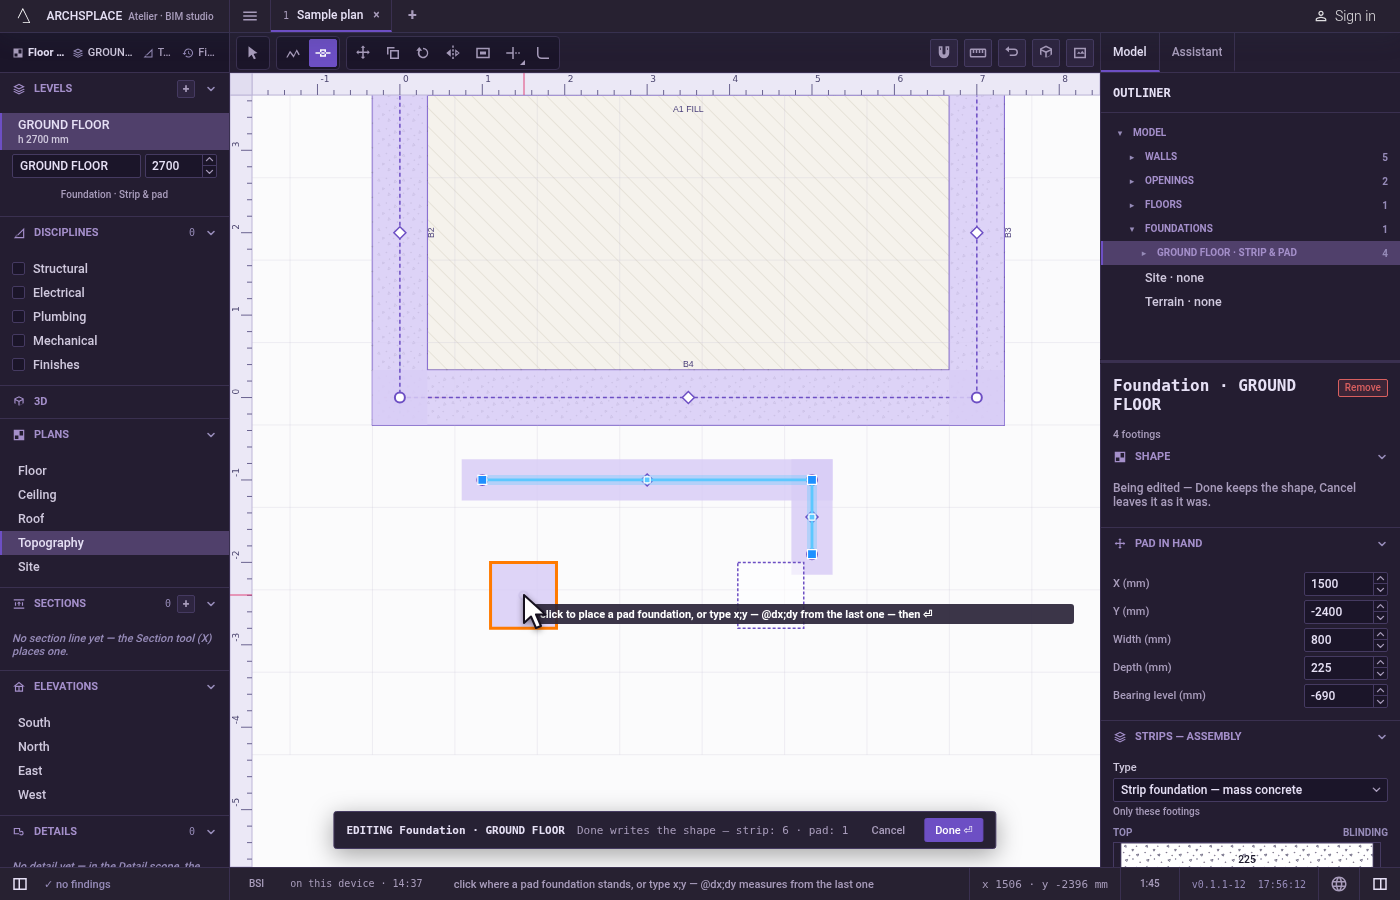
Adjust with Select. Press
V. Drag a corner to move it, or a footing to slide it whole; while dragging, type a length in the project's units and pressEnterto move it exactly that far along the way you pull. Drag a diamond to curve its leg; while it moves, type a radius and pressEnterfor an exact arc, or0to straighten it again.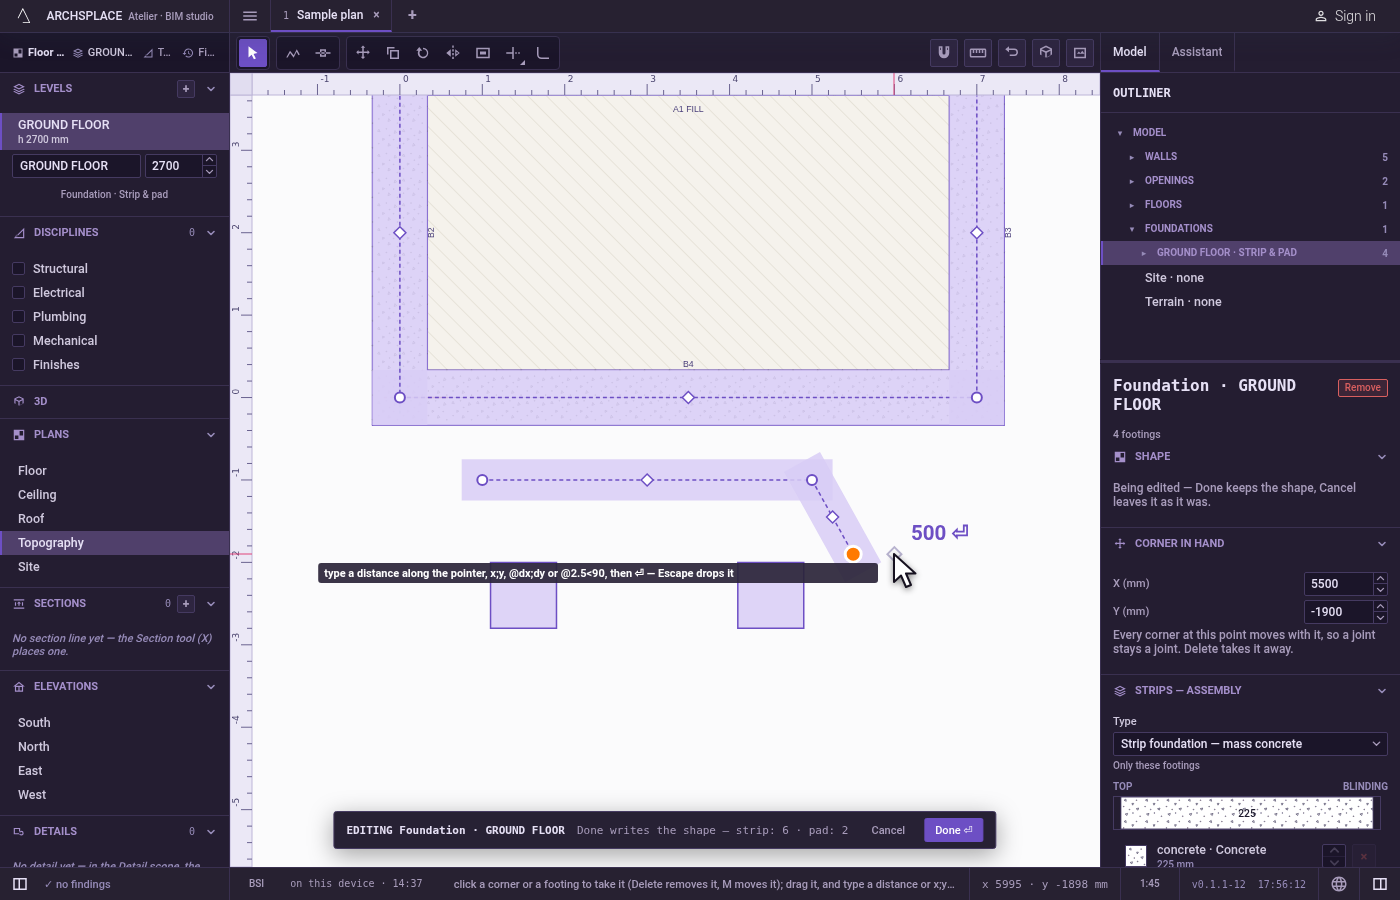
Set a footing's numbers. Click a footing to take it. The panel shows it under Edge in hand or Pad in hand: its width, its depth, its bearing level and, for a strip foundation, its Shape, Plain strip or Stepped with the ground, the stepped one with its Step rise and Cover below ground. A corner in hand shows its X and Y.
Deletetakes away what you hold, a corner with every footing meeting there.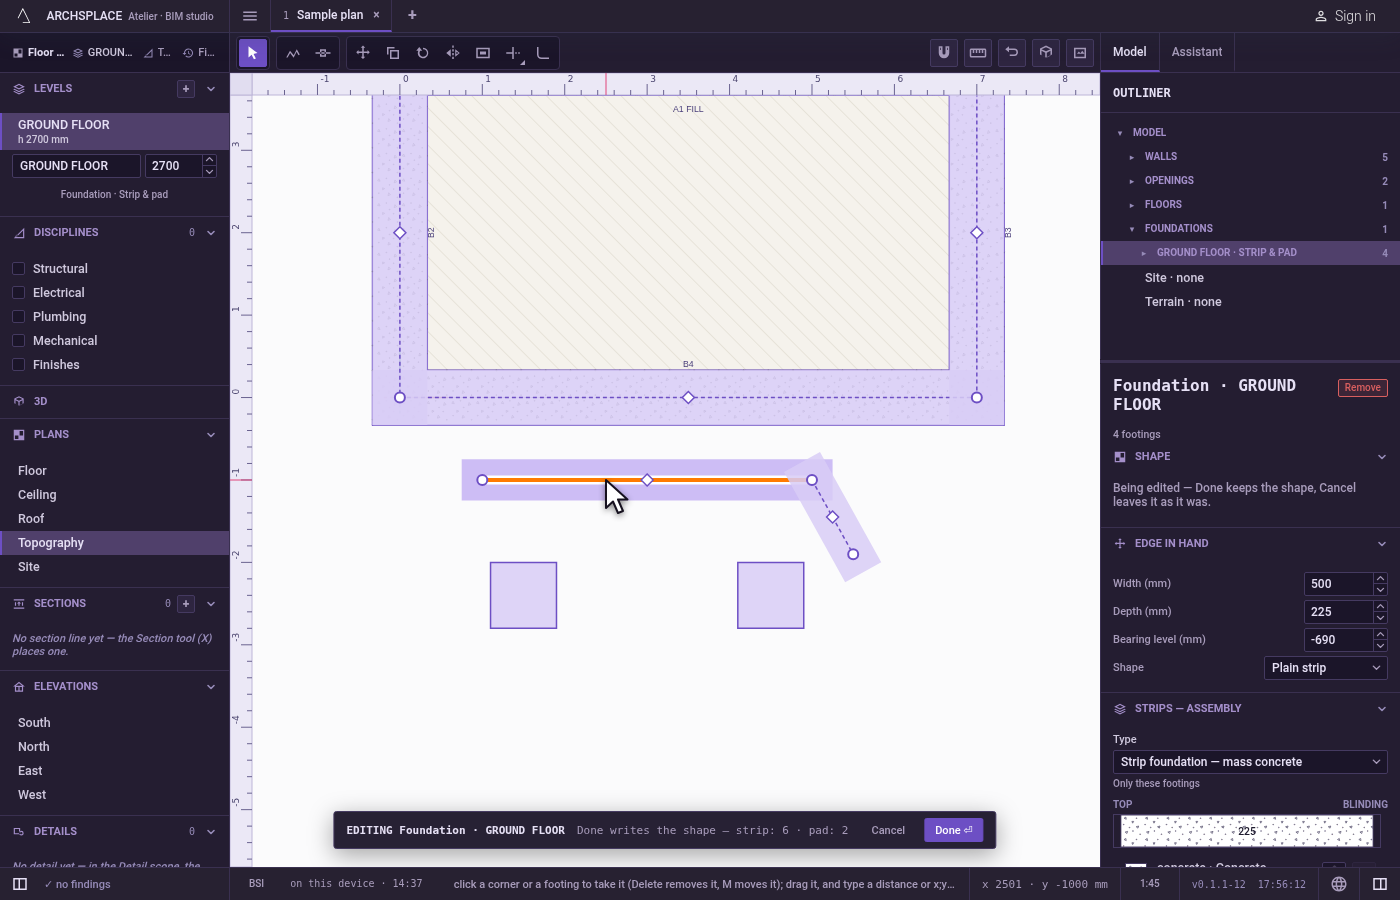
Write it with Done. Click Done ⏎, or press
Enterwith Select in hand. The model checks the shape and writes it in one step; the studio says that the foundation's shape is written, and the editor closes.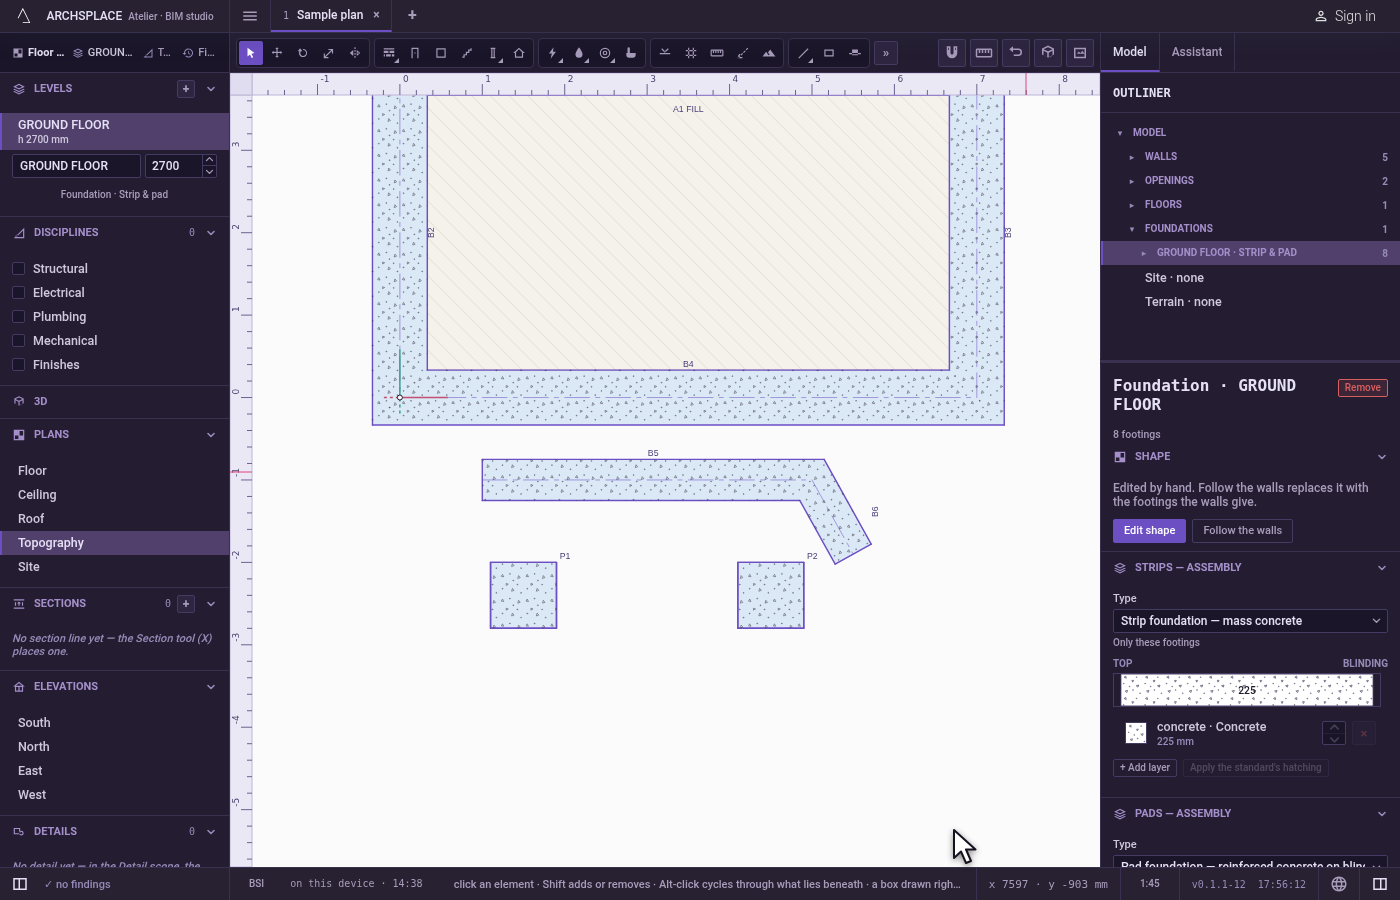
What it refuses
- A raft or piles. The editor works on strip and pad foundations. On a level founded on a raft or on piles, the studio says so and the editor does not open.
- Delete with nothing held. With nothing in hand,
Deleteremoves nothing and the studio says nothing is selected in the editor. It never deletes the whole foundation. - An axis of one corner, or a leg of no length. Done refuses them, names the axis, and the draft stays.
- Nothing at all. A draft with no footing left is refused: Remove, in the panel, takes the foundation away.
- A curve too tight. A radius under half the footing's width cannot curve it, and the studio says so.
- A typed value that is no point. The studio shows what it expects, such as
2.5,3;1.5,@0.5;0or@2<90. A step@dx;dyfor a pad foundation before any has been placed is refused: typex;y. - Enter as Done with another tool in hand. With any tool but Select,
Enterends that tool, so a gesture half given never writes the foundation. - Losing the draft by a key.
Esckeeps the draft and says so: Done writes it, Cancel drops it and leaves. - A shape the model refuses. When building the shape fails, the studio says why, the foundation stays as it was, and the draft stays in the editor.
What it writes to the contract
Done writes the level's entry in foundations, the one with its level and kind: "FOOTINGS". Its runs are the axes, each a list of points in plan metres, closed: true when it closes, and its edges the numbers of each leg, the leg from the first point first; null takes the level's numbers. Its pads are the pad foundations, each with its at point and its own numbers when it has some:
A leg's entry may hold width, depth, bottom (the bearing level, the height its underside reaches), and kind: "STEPPED" with step and cover. A point that starts a curved leg carries a third number, the arc's bulge. The exceptions the level's walls and columns carried leave with the same write: the shape carries them now. From then on the walls are no longer read; Follow the walls in the panel drops runs and pads and generates the footings again.
Common questions
Can I draw a footing that is not under a wall?
Yes. Open the foundation editor, press L and click the points of the footing's axis, then press Enter. Once Done writes the shape, the footings no longer follow the walls: they are the ones you drew.
How do I make one footing wider than the others?
In the editor, click that footing to take it. The panel shows its own width, depth and bearing level; type the width there. Back to the level's numbers puts the level's own values back.
How do I go back to footings generated from the walls?
Select the foundation and click Follow the walls in its panel. The shape you drew is dropped and the footings are generated from the walls and columns again, in one step you can undo.