TerrainVRin the studio
Terrain editor
The terrain editor opens on the survey grid of the ground, where every node is a dot you select and give the height a surveyor measured there, one dot at a time or many at once. Its Radius tool gives one dot a height and eases every dot inside a ring around it towards that height, for a mound or a hollow.
What it is
The ground of a project is measured, never sculpted. The Terrain tool draws the limit of the surveyed field and lays a grid of nodes inside it, one every metre unless you choose another spacing. The terrain editor is where those nodes get their heights. Inside it, every node is a dot, the rest of the plan steps back, and the toolbar holds two tools, Select and Radius. A strip at the foot of the view, titled TERRAIN, holds the same two tools as Dot and Radius, the size of the ring, and Done ⏎.
A dot no one has read yet stands at the height set for unread nodes, 0 m unless you change it in the terrain's panel, so the ground is never left with a hole. Once you type its height, the dot is a reading: the Topography plan marks it with a small cross and its figure, and the contour lines are drawn through it.
Select (V) takes dots: a click takes one, Shift and a click add one or drop it, and a box dragged from empty ground takes every dot inside. Digits typed then go to every dot you hold, and Enter writes that height as their reading. A dot can be dragged to slide it on the plan, keeping its reading. A click on empty ground lays a new dot there, unread and already selected.
Radius (R) works around one dot. A ring follows the pointer, 3 m in radius at first. A click takes one dot as the ring's centre, and the height you type goes to that dot when you press Enter, while every dot inside the ring moves towards it, the more the closer it stands: a dot halfway out goes half the way, and a dot on the ring keeps its height. A dot inside the ring that was never read starts from the height the ground has under it.
The same editor opens in the 3D, on the model: the ground's mesh and every dot turn blue, the same strip stands at the foot of the view, and a dot dragged there goes up or down instead of sliding.
When to use it
- Typing the heights a land surveyor measured, dot by dot, or a whole row at once when it was level.
- Correcting a reading: take the dot again and type its height.
- Adding a measured point the grid does not have, such as the foot of a bank.
- Shaping a mound or a hollow around one point, without typing each dot.
The steps
Open the editor. Right after the Terrain tool draws the field, the editor opens on its own. Later, double-click the terrain on the plan, or select it and press
Enter, or click Edit terrain in its panel. The plan shows the Topography discipline, every dot of the grid appears, and the strip at the foot reads click a dot · Shift adds · drag lifts.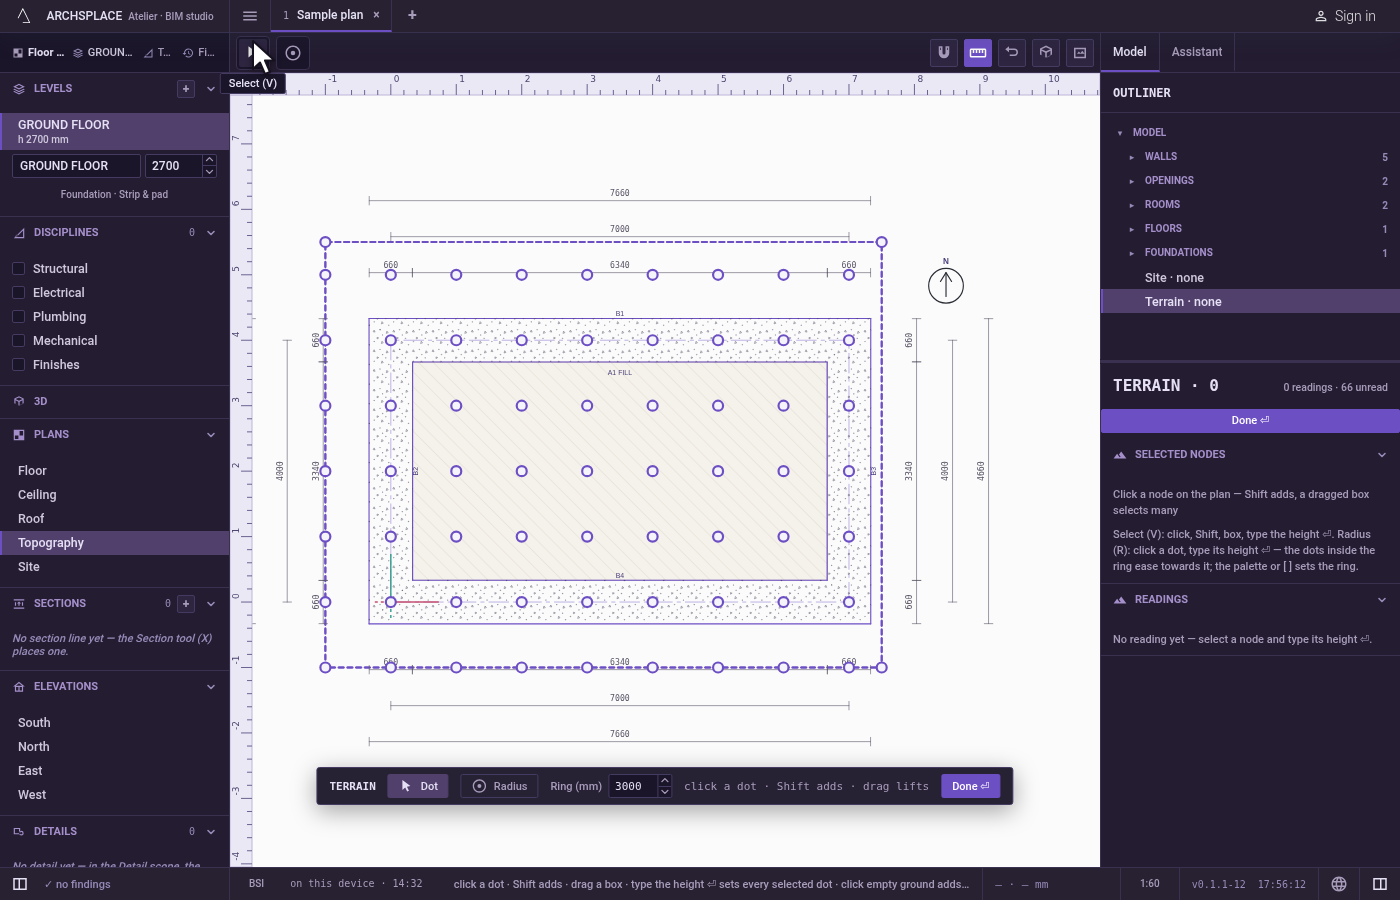
Select a row with a box. Press on empty ground beside the north row of dots and drag across to its other end. Every dot inside the box is taken, and the strip says how many, such as 9 dots · type the height ⏎.
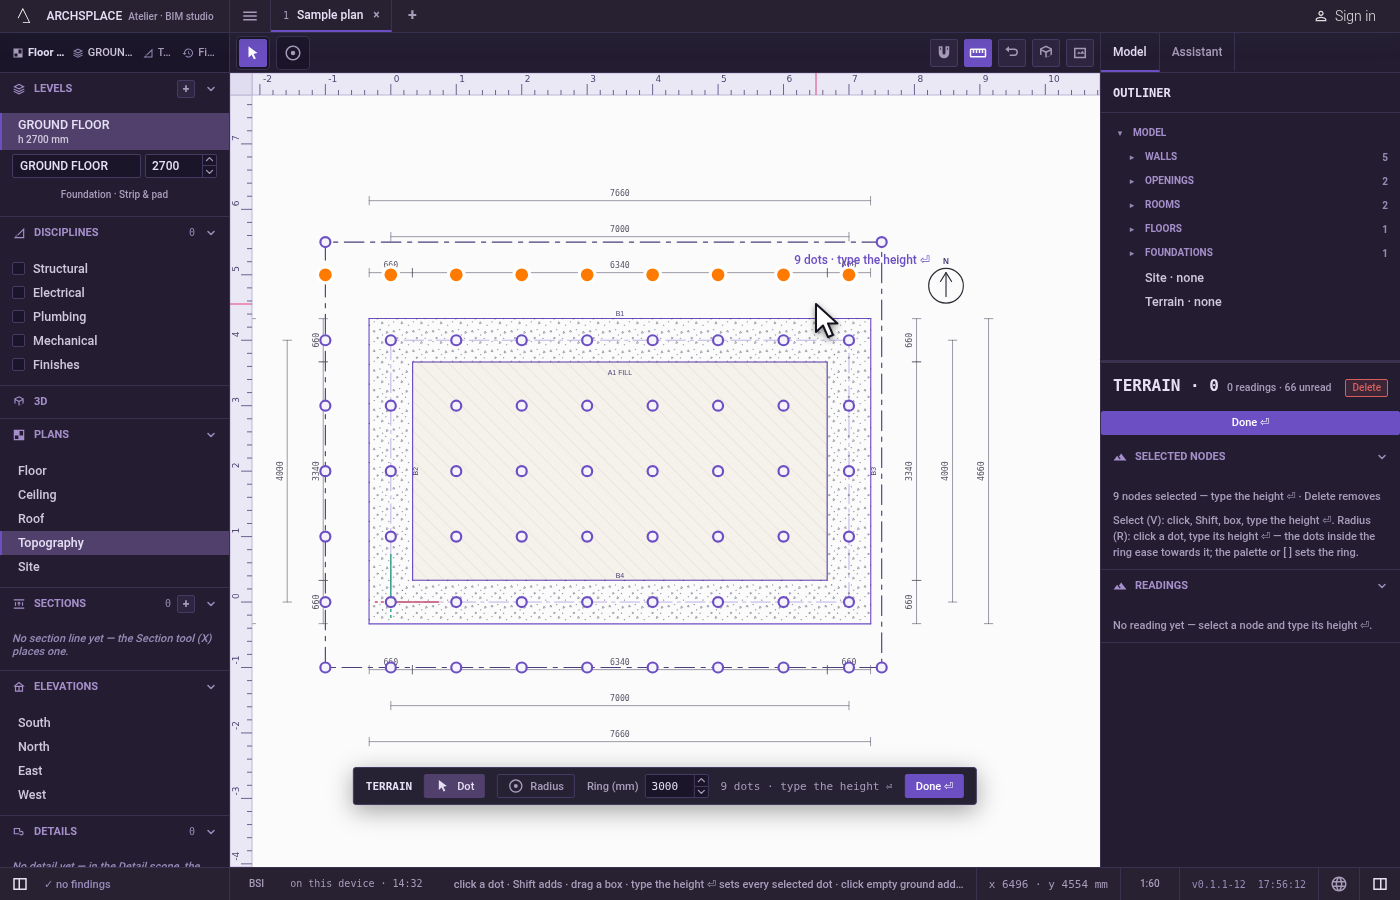
Type the height and press Enter. Type the height measured along that row, in the project's units. Beside the last dot the studio echoes the height you type, with × 9 after it.
Enterwrites it: the nine dots become readings, and the contour lines appear. Zero and negative heights are taken as typed.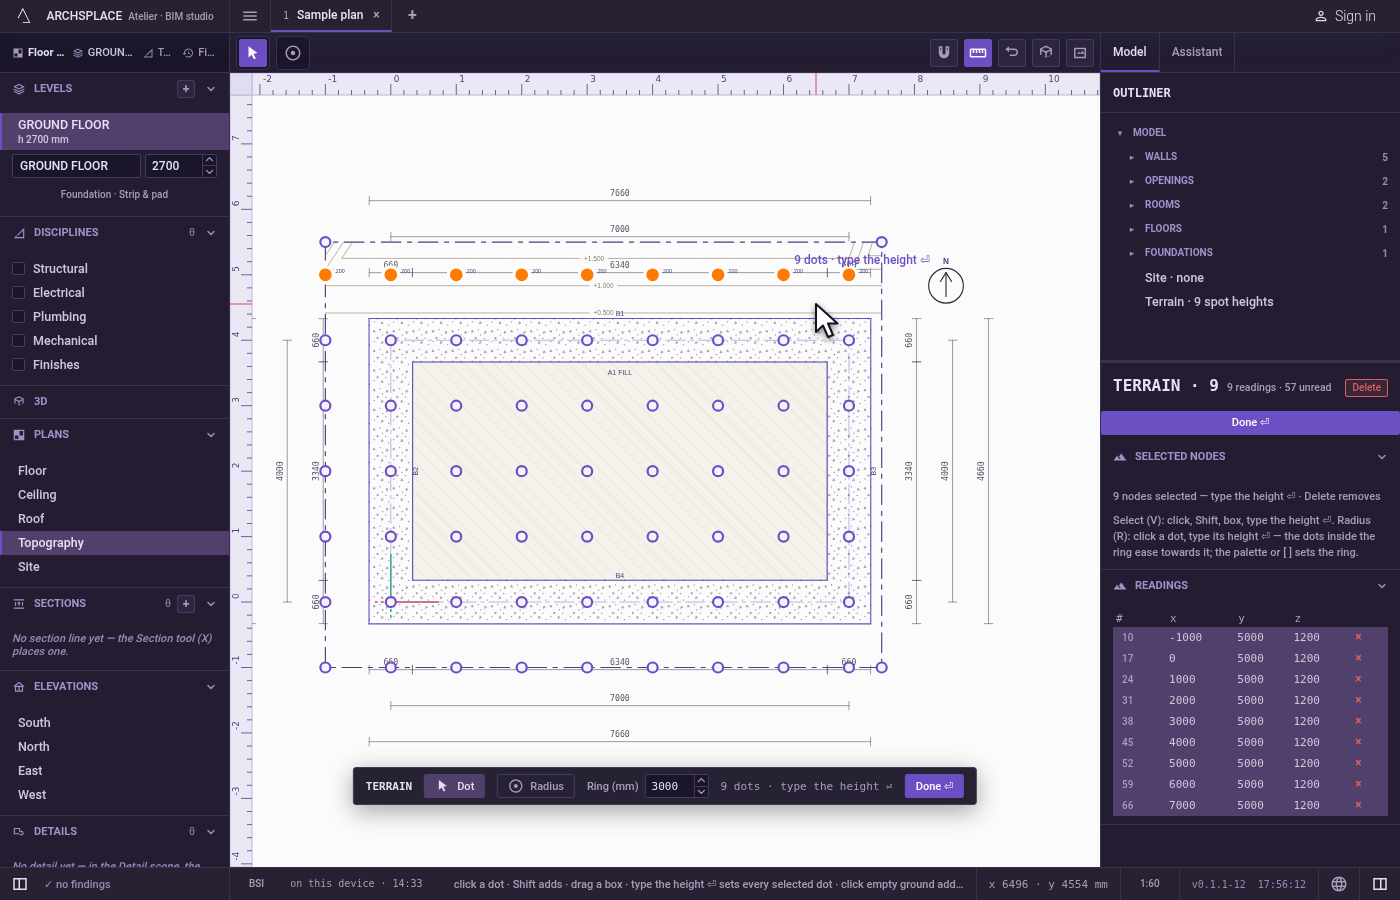
Correct one dot. Click one dot of the row: it alone is held, and its reading shows beside it. Type its new height and press
Enter.Shiftand a click would have added a second dot to type both at once.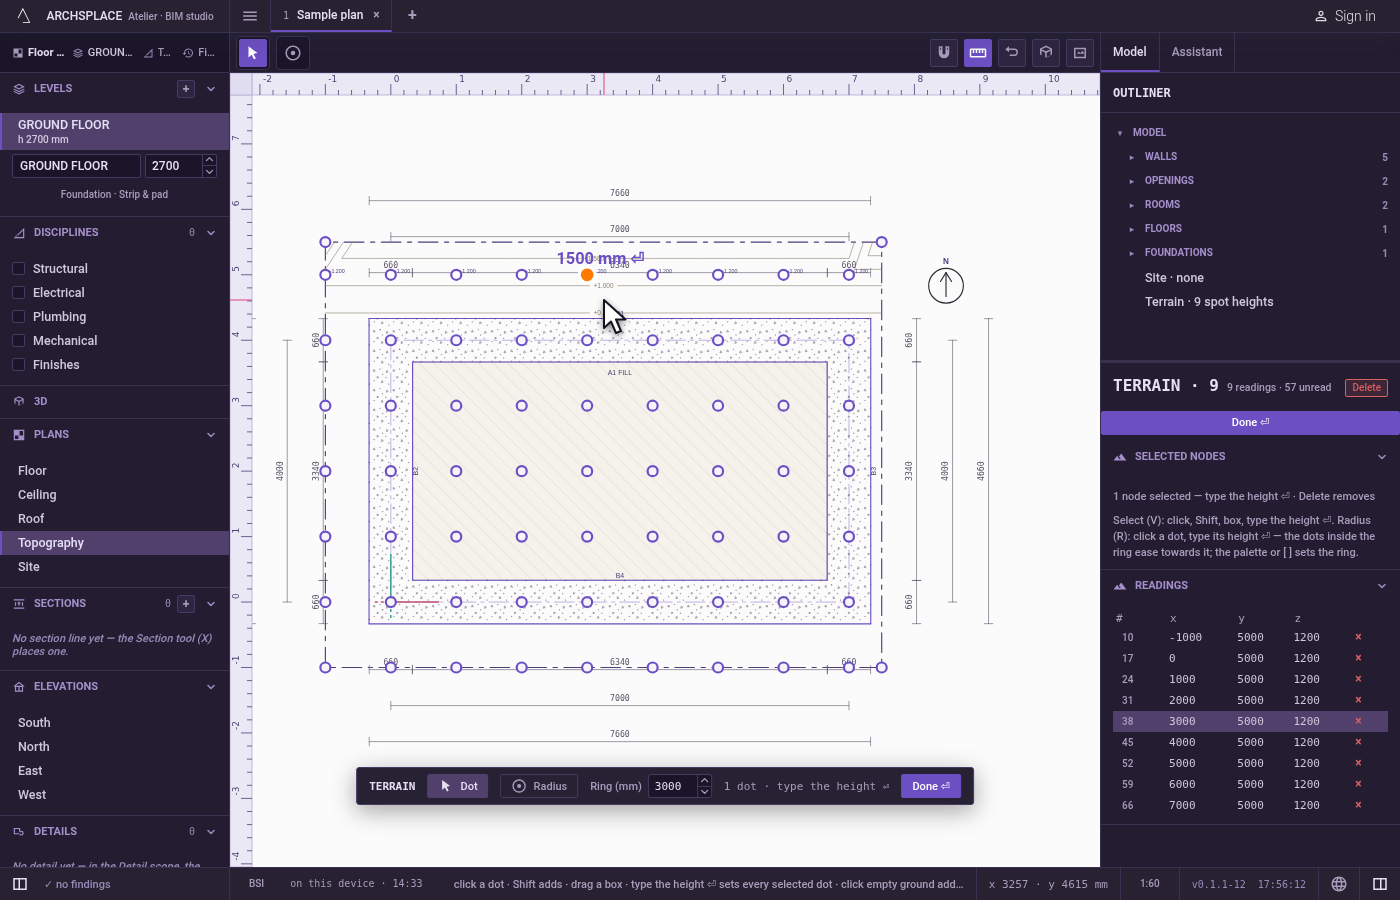
Add a dot. Click the empty ground where a point was measured between the grid's dots. A new dot is laid there, unread and selected, and the words beside it say to type the height. Type it and press
Enter.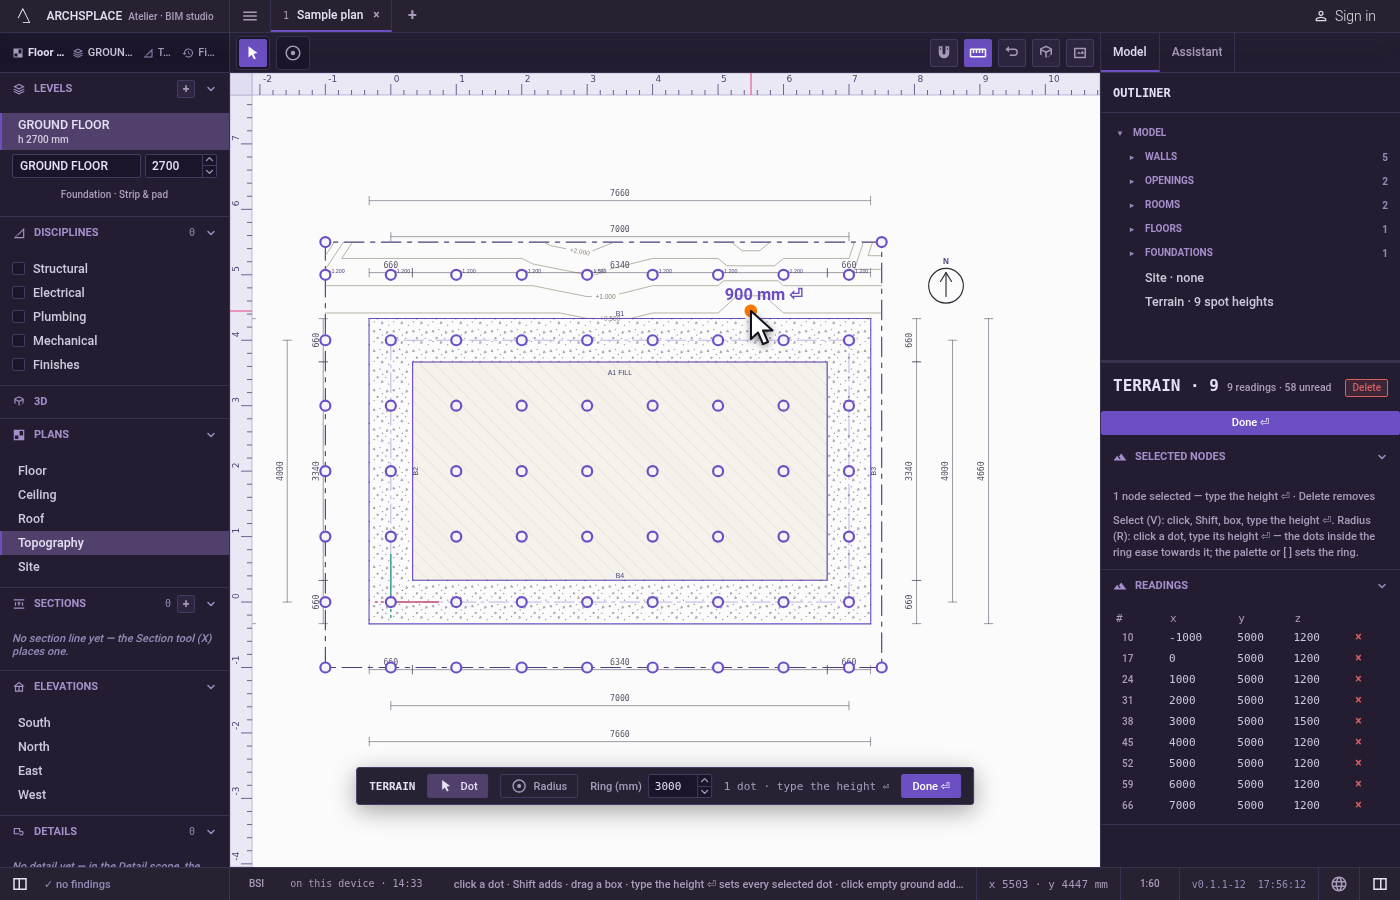
Ease the ground with Radius. Press
R, or click Radius on the strip. Press]once to widen the ring by a metre;[shrinks it, one metre at a time, from 1 to 30 m. The list beside the tools offers 1, 2, 3, 5, 8 and 12 m, shown in the project's units, and the strip's Ring field takes any length you type. Click the dot at the top of the mound, type its height and pressEnter. The dot takes that height, and every dot inside the ring rises towards it.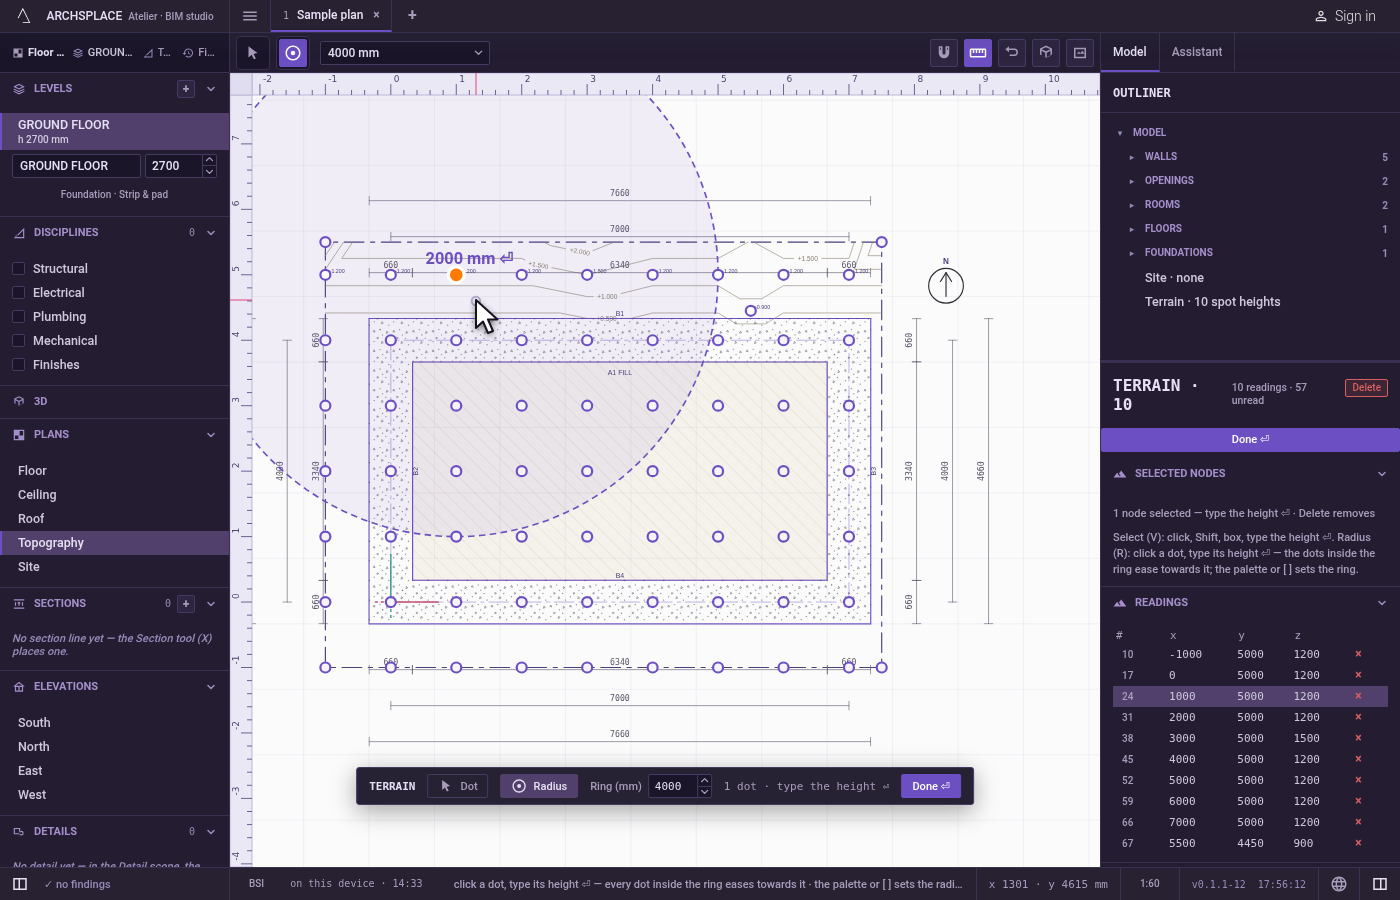
Leave the editor. Click Done ⏎, press
Esc, or pressEnterwith nothing typed. The editor closes with the terrain still selected.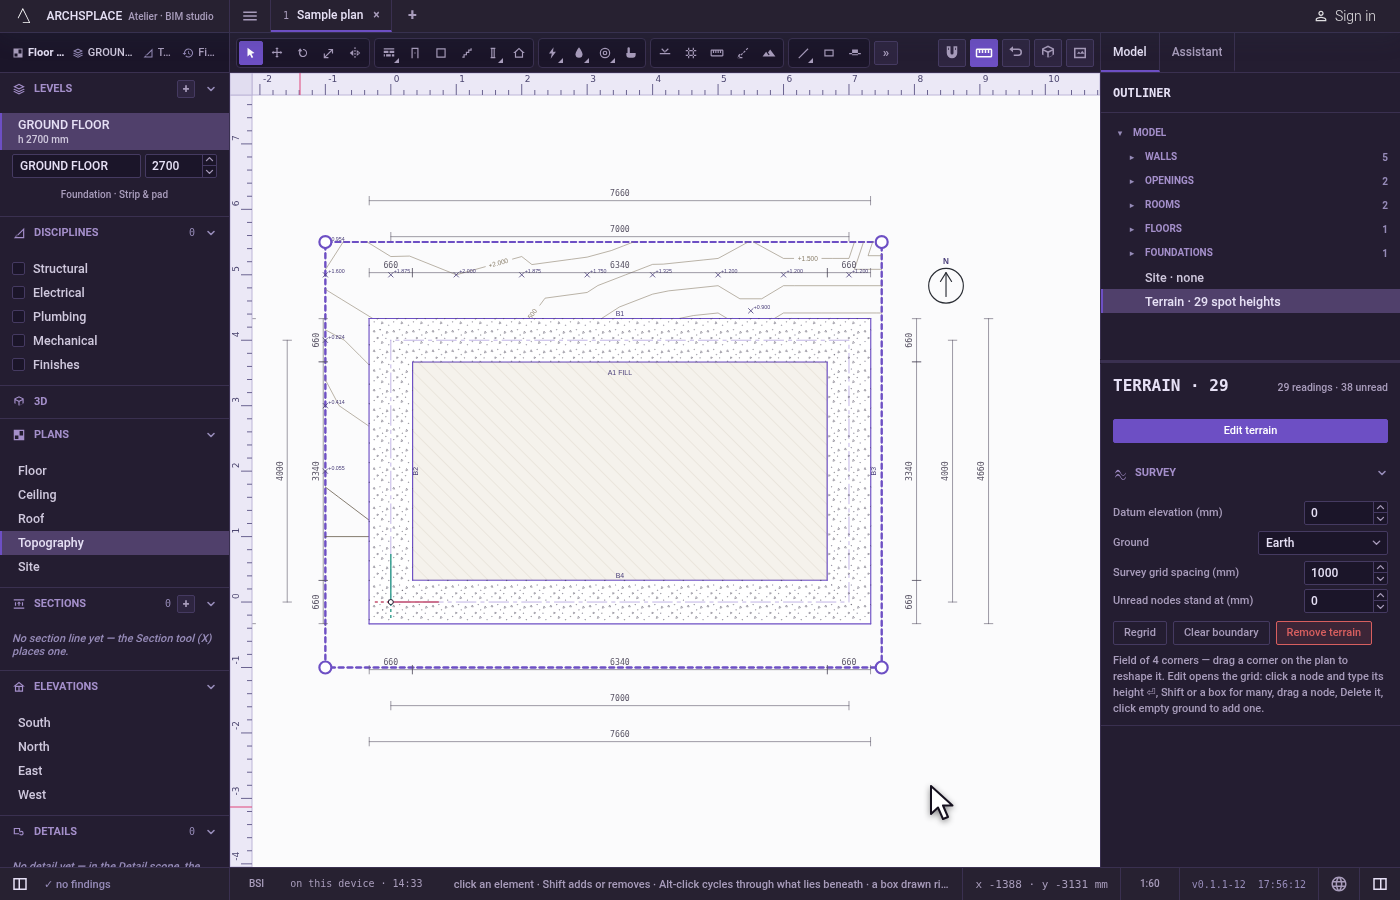
What it refuses
- Moving or stretching the ground as a whole. The ground is measured: Move and Scale leave the terrain where it is and say to edit its spot heights.
Deleteon the whole terrain is refused too: delete its dots, or clear it in its panel. - Two heights on one point. A dot laid exactly on another dot's point gives that plan point two heights. The model reports it as a finding;
Ctrl+Ztakes it back. - A new dot with Radius. With Radius in hand, a click on empty ground lays nothing, and
Shiftadds nothing: the ring works around one dot. - A height with no dot held. Digits typed with no dot held go nowhere.
- A ring out of the keys' range.
[never takes the ring under 1 m, and]never past 30 m. - Dots outside the ring. Radius leaves every dot beyond the ring as it was, readings and unread dots alike.
- The plan's other tools. Inside the editor the toolbar holds Select and Radius only, until you leave it.
What it writes to the contract
The terrain is one entry of the contract, terrain, and its dots are its points, each [x, y, z] in plan metres, z the height from the model's zero, null while the dot is unread:
Enter writes the typed height, rounded to the millimetre, as the z of every dot held. A click on empty ground appends [x, y, null] to the list, Delete takes the dots held out of it, and dragging a dot on the plan changes its x and y and keeps its z. Radius rewrites the z of the clicked dot and of every dot inside the ring, each rounded to the millimetre, giving a height to the unread ones among them; the ring's size is the tool's and is never written. Each of these is one step that one Ctrl+Z takes back. The ground's surface, its contour lines and the ground in the sections and the 3D are worked out from the points each time the model is built, and never written.
Common questions
How do I give a whole row of survey dots the same height?
Open the terrain editor, press on empty ground beside the row and drag a box over it. Every dot inside is selected. Type the height and press Enter: each of them takes it.
How do I add a measured point between the dots of the grid?
In the terrain editor, with Select in hand, click the empty ground where the point was measured. A new dot is laid there, unread and already selected. Type its height and press Enter.
How do I make a mound in the ground?
Press R, size the ring with [ and ], click the dot at the top of the mound, type its height and press Enter. The dot takes the height, and every dot inside the ring rises towards it, less and less out to the ring.