Panels
Joint panel
The joint panel is what the column on the right shows when a joint is selected, the point where walls, pipes or beams meet: its X and Y, then, for each run meeting there, its length and its angle. A value typed there moves the joint, and every run that meets at it follows, so the corner stays closed.
What it is
A joint is where runs meet: two walls at a corner, several walls at one point, a wall ending on another wall's face, a pipe's or a beam's end. Under the Select tool, every selected wall, pipe or beam shows a grip on each of its joints, in the plan, the 3D, the sections and the elevations. A click on a grip, without dragging, selects its joint, and the column on the right shows the joint panel.
At its head stand JOINT and what kind of joint it is: Runs meeting at one point, An end on a wall's face or A free end. Then:
- Position: its X and its Y on the plan. A joint on a wall's face says on which wall it stands.
- One block per run meeting at the joint, titled by its reference, such as W-003: its Length and its Angle (°), the angle turning about the run's far end.
A line at the foot says that dragging a grip moves the joint and the runs meeting there follow, and that holding Alt while dragging moves this end alone.
When to use it
- Placing a corner of the house at exact coordinates.
- Setting the exact length of one wall without breaking the corner it makes with the next.
- Turning a wall to an exact angle about its other end.
- Correcting a survey point where several walls meet.
The steps
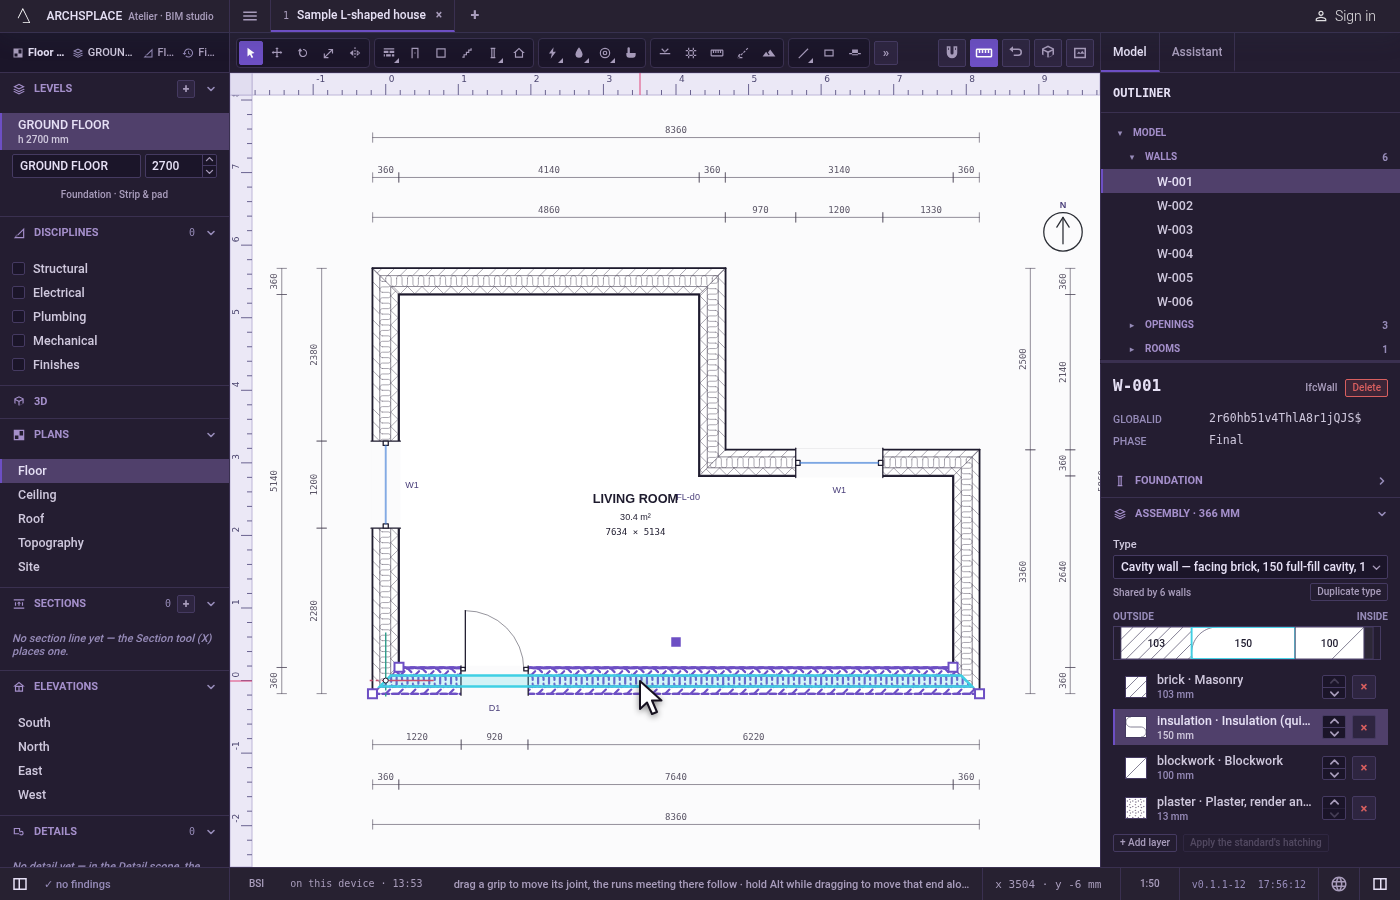
Select a wall. With the Select tool, click a wall. A grip stands on each of its corners.
Select a joint. Click the grip at the corner it shares with the next wall, without dragging. The joint panel shows JOINT, Runs meeting at one point, its X and Y, and the two walls.
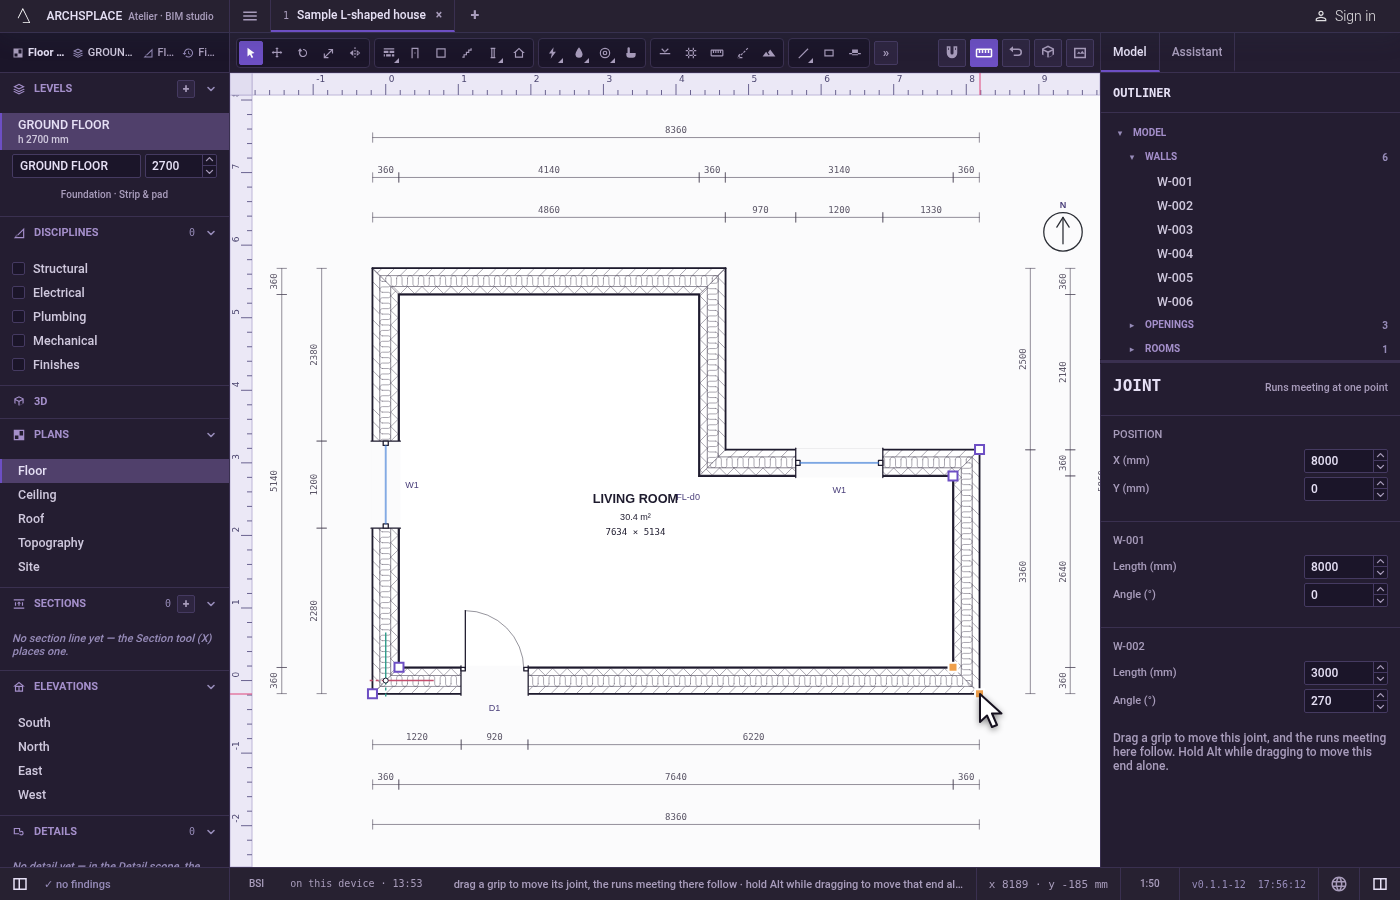
Type its position. In X, type 6000 and press
Enter. The corner moves to X 6 m; both walls follow it and stay joined.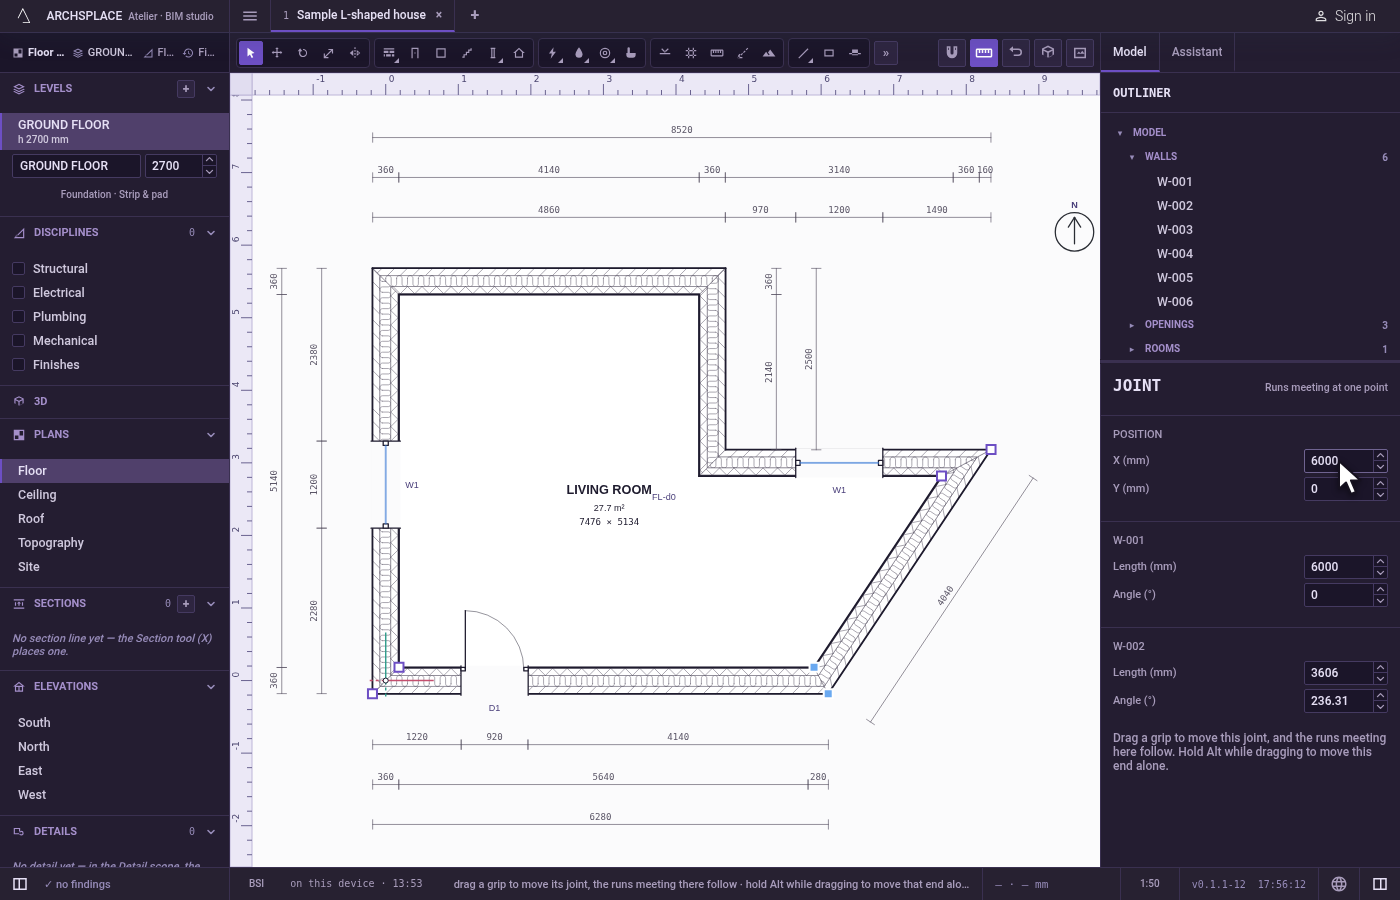
Set a length. In the block of the first wall, type 4000 in Length and press
Enter. The wall keeps its far end and its direction; the joint moves along it, and the second wall follows.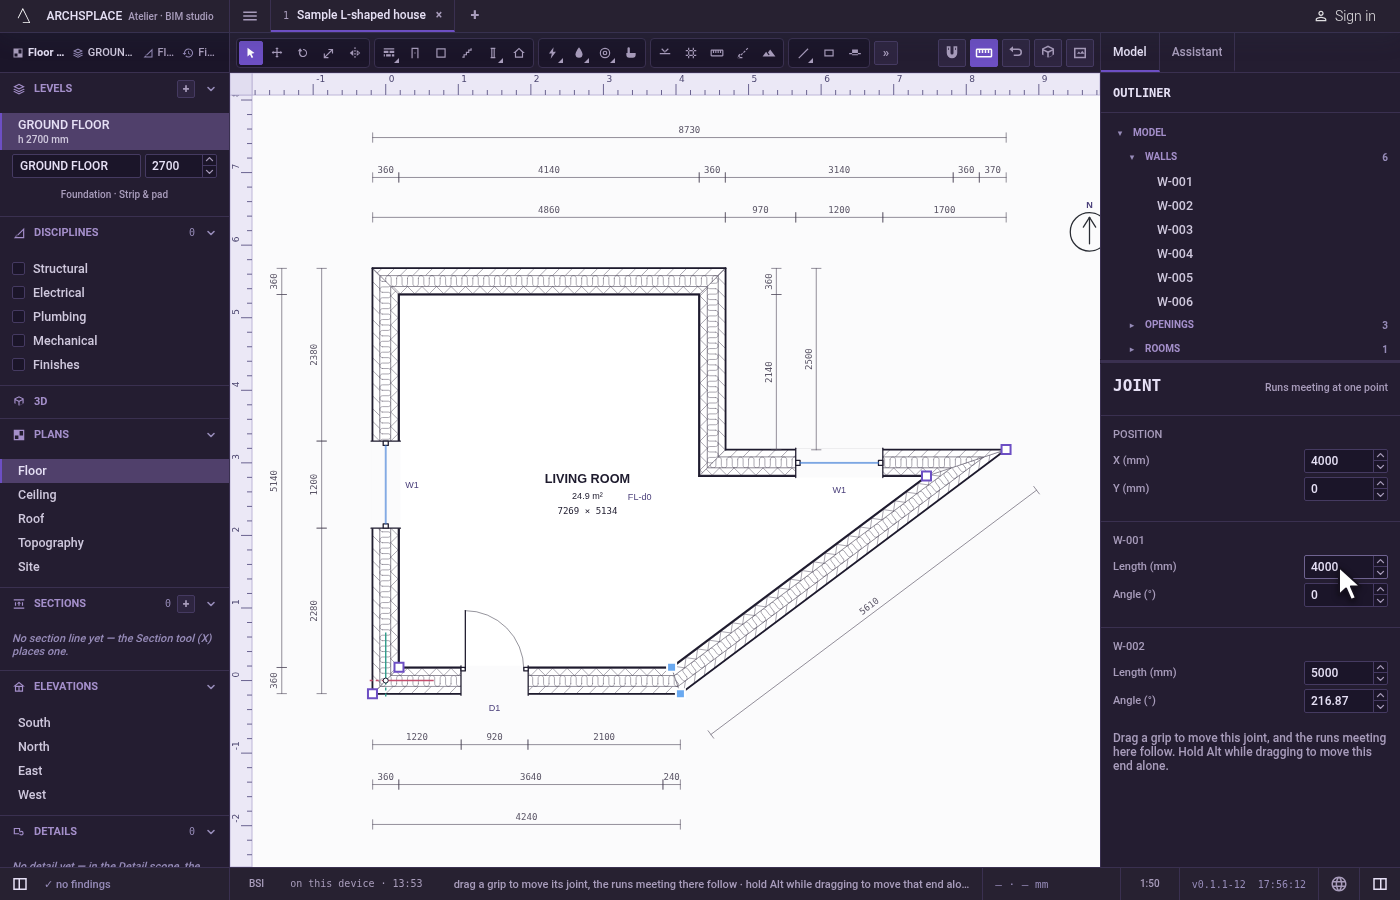
Set an angle. In the same block, type 10 in Angle (°) and press
Enter. The joint swings about the first wall's far end, and the second wall follows.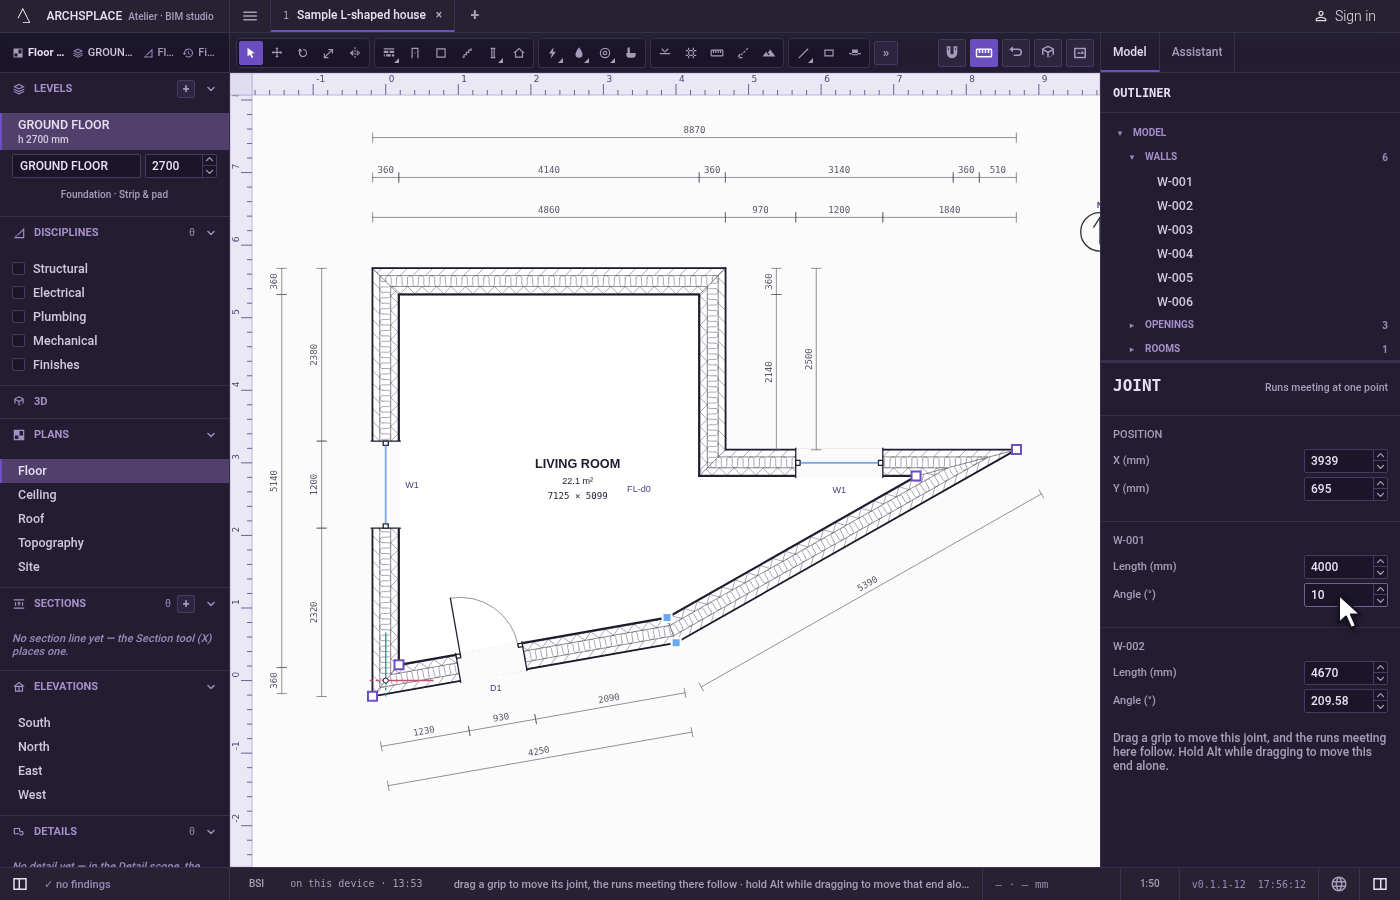
What it refuses
- A length under 1 cm. The field does not take it.
- A move the runs cannot follow. A toast says why, and the joint stays where it was. While dragging a grip, the ghost of the runs turns to the refusal colour, with the reason beside the pointer, before you let go.
- Deleting a joint. A joint goes with its runs: delete the walls, pipes or beams that meet there.
What it writes to the contract
Each value writes the ends of every run meeting at the joint, together, in their lists of the contract: the from or the to of each wall, pipe or beam whose end stands there, and the points copied onto them follow. It is one step that one Ctrl+Z takes back. The joint itself is never written: it is read from where the runs' ends meet, every time the model is built.
Common questions
How do I select a joint?
Select a wall, a pipe or a beam with the Select tool. A grip stands on each of its joints; a click on a grip, without dragging, selects that joint, and Shift-click adds or removes another one.
How do I move a corner without moving the other walls?
Hold Alt while you drag the corner's grip: only that end moves, and the other walls stay where they are.
What does the angle of a run mean?
It is the direction of the run, in degrees, turning about its far end. Typing a new angle swings the joint around that far end, and the other runs meeting at the joint follow.