Panels
Pattern placement
A pattern placement lays a pattern on one surface: a wall's outer face or its lining, a room's floor or ceiling, an area drawn on a floor or a ceiling, or a roof's covering. It says which pattern, the point a tile's corner starts from, how far the tiles turn and their scale, and it is placed by two clicks on the surface or typed.
What it is
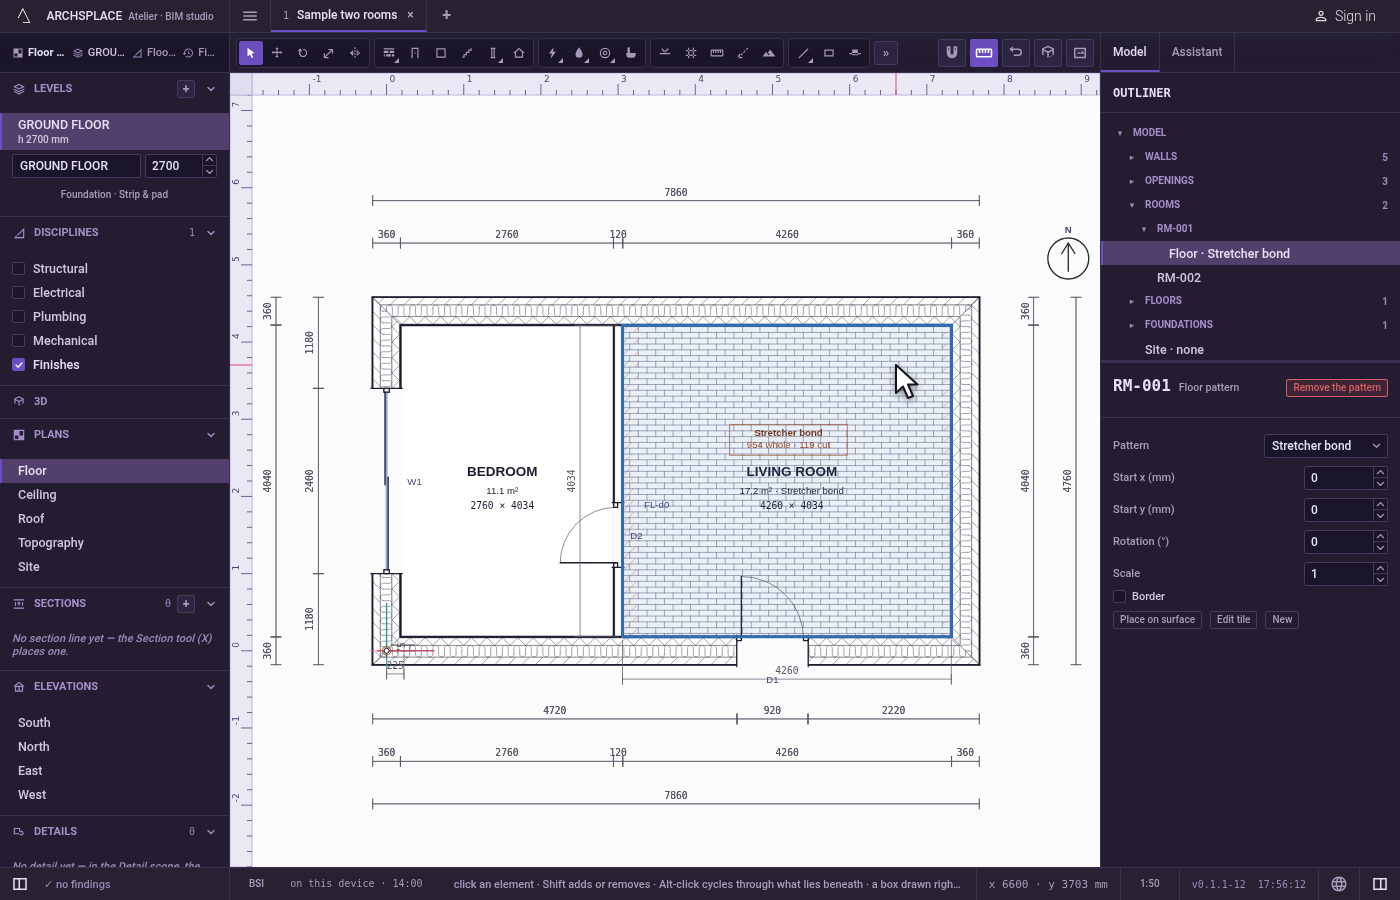
Patterns are drawn on plans, elevations and sections when Finishes is on, in Disciplines in the left panel. With Finishes on, a click on a laid pattern selects that surface's placement, in the plan, an elevation or the 3D, and the column on the right shows its panel. Its head names the host and the surface: Outer face pattern or Inner face pattern on a wall, Floor pattern or Ceiling pattern on a room, an area such as Floor pattern, area 2, or Covering pattern on a roof, with Remove the pattern (or Remove area).
The panel holds:
- Pattern: which pattern the surface lays. A wall's outer face that lays the project's facade pattern shows it as inherited, until a change makes it the wall's own.
- The start, the point a tile's lower-left corner stands on, in the surface's own frame: Start along the wall and Start above the floor on a wall, Start x and Start y on a floor or a ceiling, Start along the eave and Start up the slope on a roof.
- Rotation (°), how far the tiles turn about the start, anticlockwise, and Scale, how many times the tile's size the pattern lays.
- Border, which draws a thin line around what the pattern covers, in every view and in the DXF and the PDF.
- Place on surface, Edit tile, which opens the pattern in the pattern editor, and New. An area adds Edit outline.
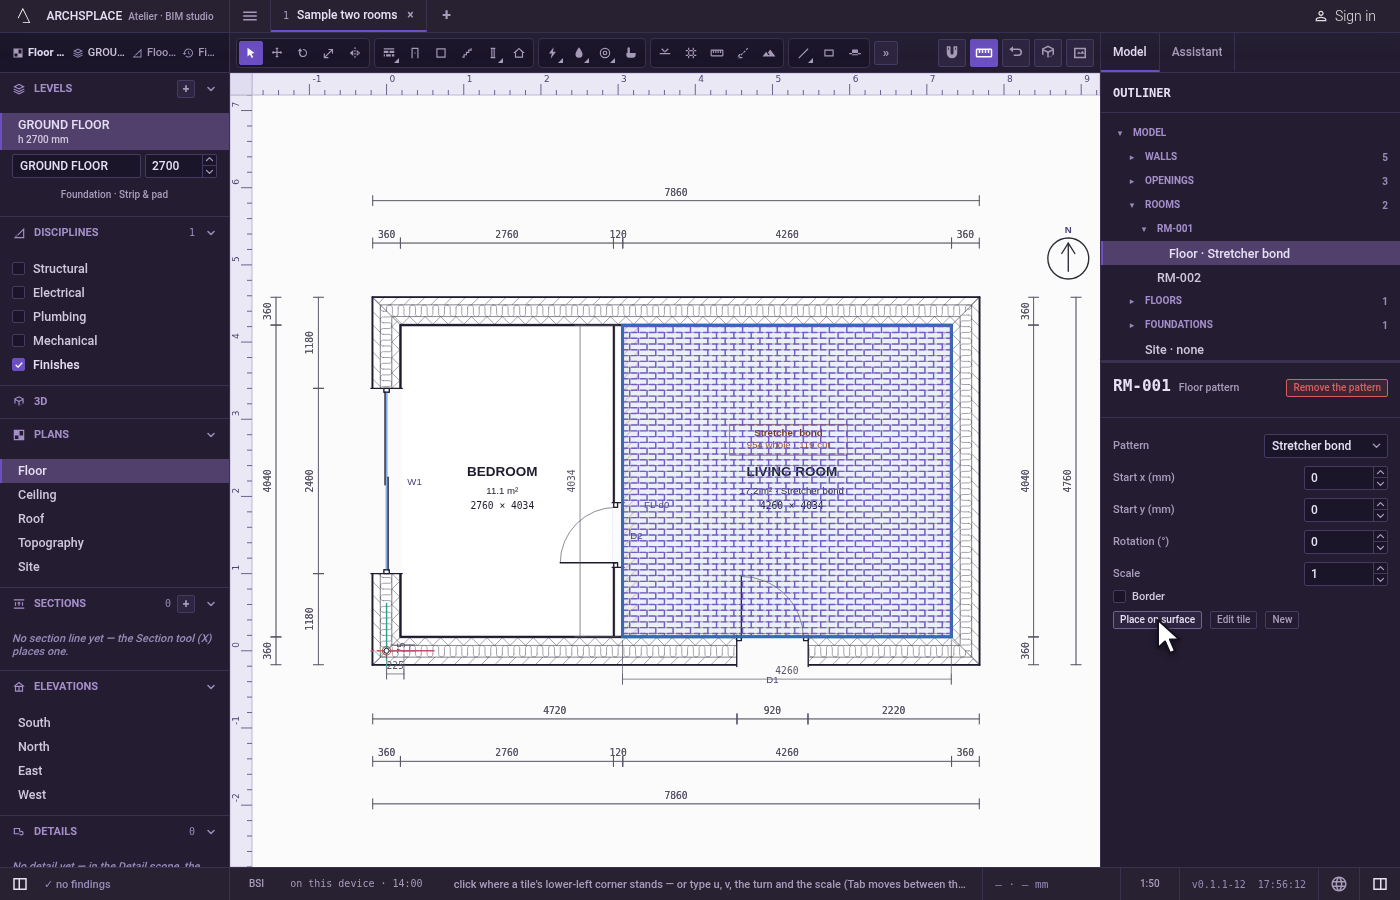
Place on surface places the start by hand, in the plan, an elevation or the 3D. The first click pins the start on the surface. Then the pointer sets the reference: the angle from the start turns the tiles, the distance is one tile's width. The second click places the pattern with that turn and scale. Enter or Space places the start alone, the tiles keeping their size and their turn. Digits, the point and the minus sign type the start's two values, the turn and the scale, Tab moving between them; Escape drops what is typed, then the start, then the tool. The status bar says each step.
Every placement is also a row of the outliner, under its host.
When to use it
- Setting out floor tiles from a doorway or a corner.
- Turning a floor pattern to follow a wall at an angle.
- Starting a facade's brick courses from the plinth.
- Laying another tile on part of a floor, such as a carpet zone or a shower.
The steps
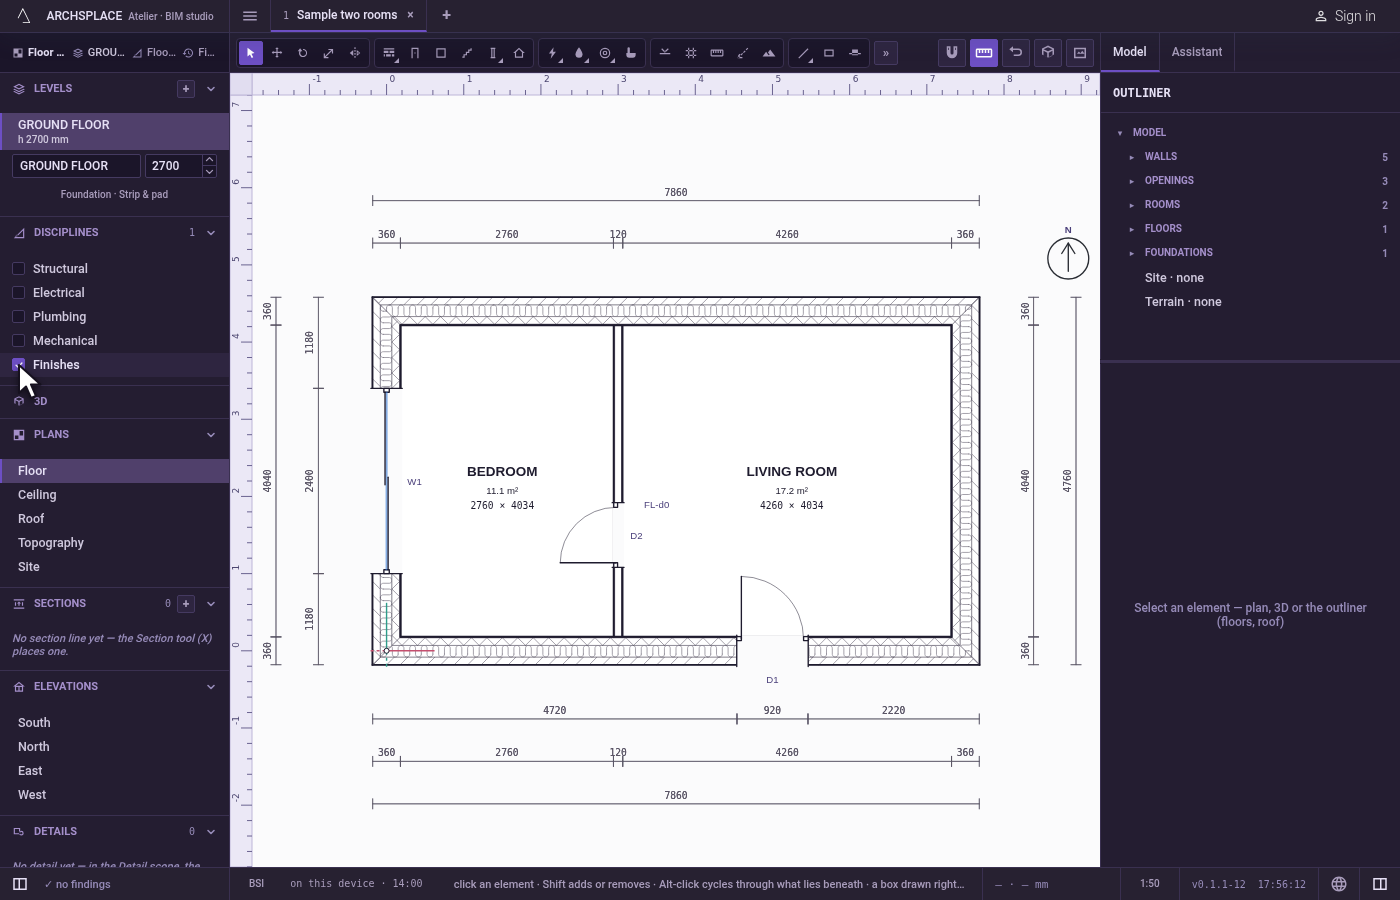
Turn Finishes on. In the left panel, under Disciplines, turn Finishes on. The patterns are drawn.
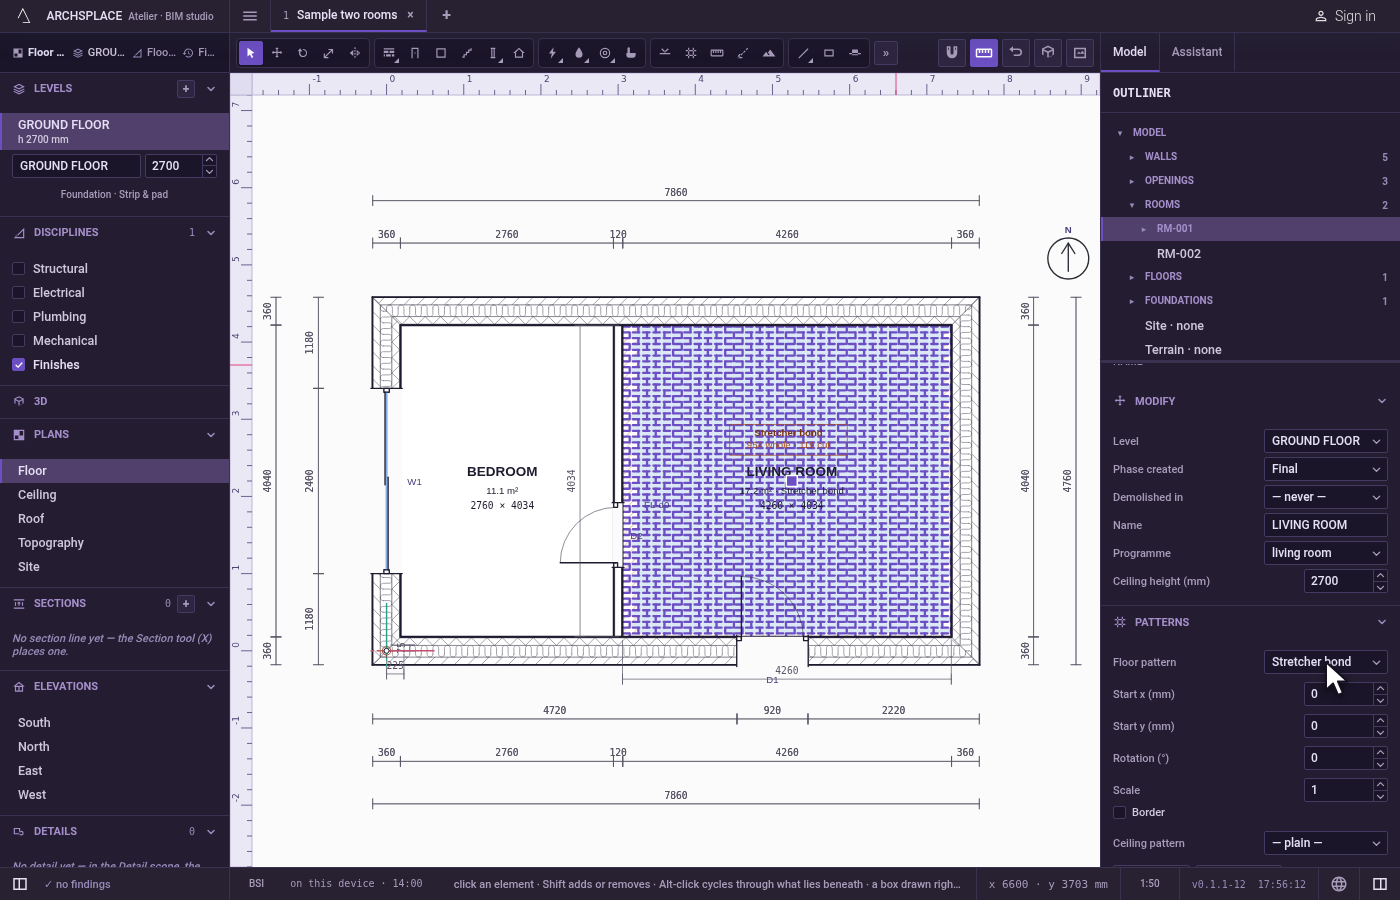
Lay a floor pattern. Select a room, open Patterns in its panel and choose a pattern in Floor pattern. The floor of the room shows it.
Pick the placement. Click the pattern on the room's floor. The panel shows Floor pattern and its fields.
Arm the placement. Click Place on surface. The status bar asks for the point where a tile's lower-left corner stands.
Pin the start. Click the room's corner by the door.
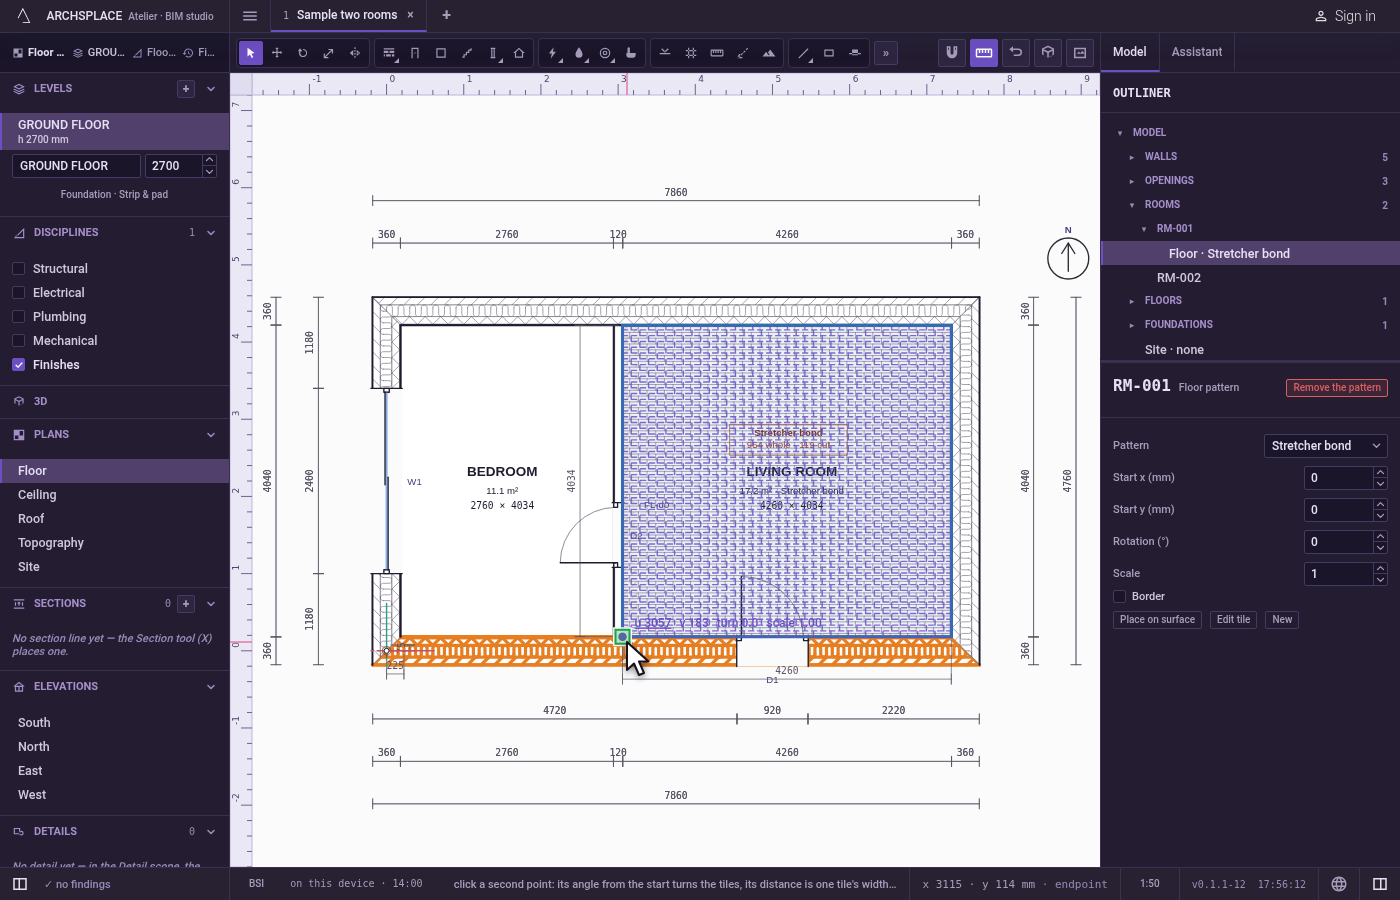
Turn and size it. Click a second point along the wall. The tiles turn to follow the wall, one tile's width the distance between the two points. Or press
Enterto keep their size and turn.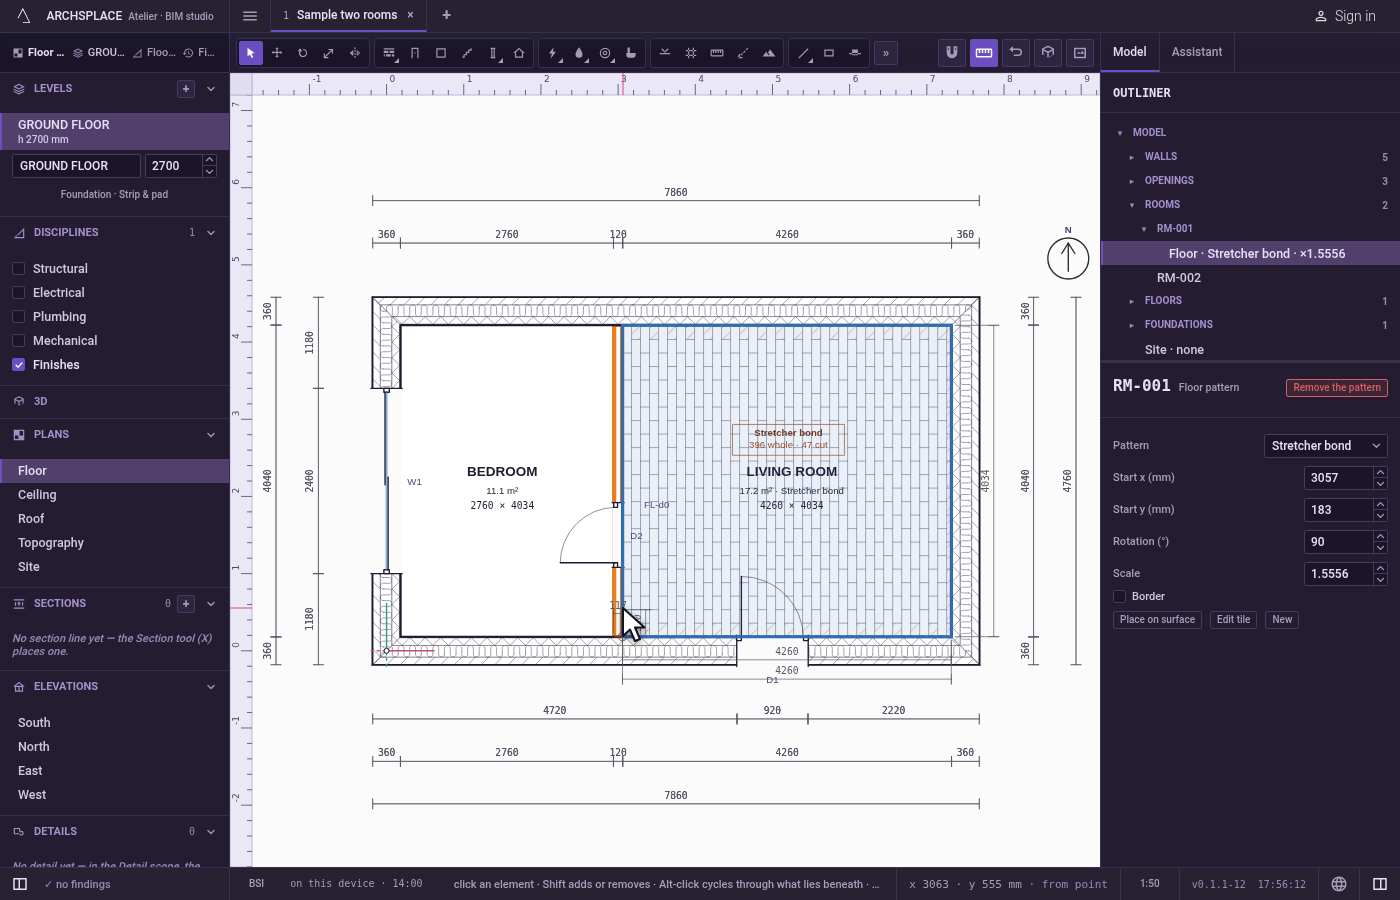
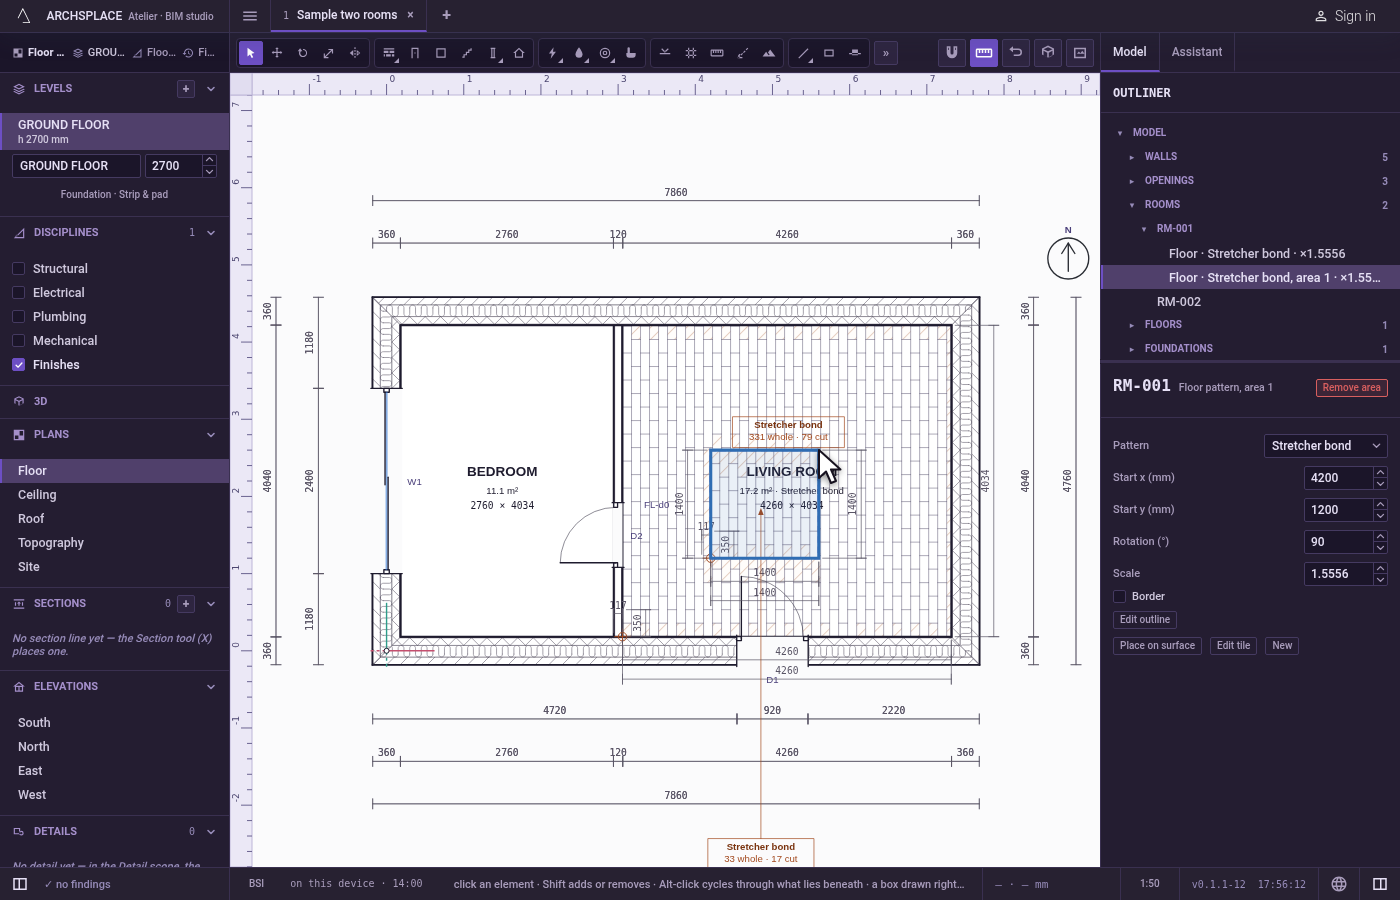
Add an area. In the room's panel, click Add floor area, draw the area's outline in the sketch editor and click Done. The area lays its own pattern over the floor's.
What it refuses
- Placing with Finishes off. It asks you to turn Finishes on: a pattern is drawn only there.
- Placing from another view than the plan, an elevation or the 3D.
- A ceiling that is not lowered, in the 3D. It has no surface there: place its pattern from the ceiling plan.
- A point off the surface. It says the point is not on the pattern's surface, and nothing is written.
- A second point on the start, unless the turn and the scale are both typed.
- A scale of 0 or less, or a typed value that is not a number.
- An area whose outline holds an island, encloses several outlines or encloses nothing. It is one plain outline.
- Moving, deleting or copying a placement as an element. A placement belongs to its surface: change it in its panel, or remove it.
What it writes to the contract
Each edit writes the surface's whole placement on its host, one step that one Ctrl+Z takes back: facadePattern or liningPattern on a wall, floorPattern or ceilingPattern on a room, coveringPattern on a roof. A placement reads:
pattern names the pattern, anchor is the start in metres, rotation in degrees, scale the factor and border true only when it is on. An area is written in the room's whole list, floorAreas or ceilingAreas, each with its outline and its placement. Remove the pattern writes nothing in its place, and the surface goes back to what it inherits, or lies plain.
Common questions
How do I start the tiles from a precise corner?
Select the pattern on its surface with Finishes on, click Place on surface in its panel, then click the corner where a tile's lower-left corner must stand, and press Enter. The tiles keep their size and turn, and start from that point.
How do I turn a floor pattern to follow a wall?
Click Place on surface, click the start, then click a second point along the wall: the angle from the start turns the tiles, and the distance sets one tile's width. Or type the turn in degrees.
How do I lay a different tile on part of a floor?
In the room's panel, open Patterns and click Add floor area. Draw the area's outline in the sketch editor and click Done: the area lays a pattern of its own over the room's floor pattern.