PlanNin the studio
Callout
Callout boxes a region of a plan, a section or an elevation with two clicks and makes it a view of its own: the same region drawn again larger, at 1:20 unless you choose another scale. The view it comes from keeps a dashed box and a bubble that names the callout and the sheet it is placed on.
What it is
Callout is the last tool of the detail group, on the toolbar of every plan, section and elevation. Two clicks box a region of the view, and the region becomes a view of its own: the same drawing worked out again inside the box, at a larger scale, 1:20 unless you give it another. Nothing is copied. The callout is drawn from the model each time it opens, so it follows every change to the walls, floors and openings inside the box.
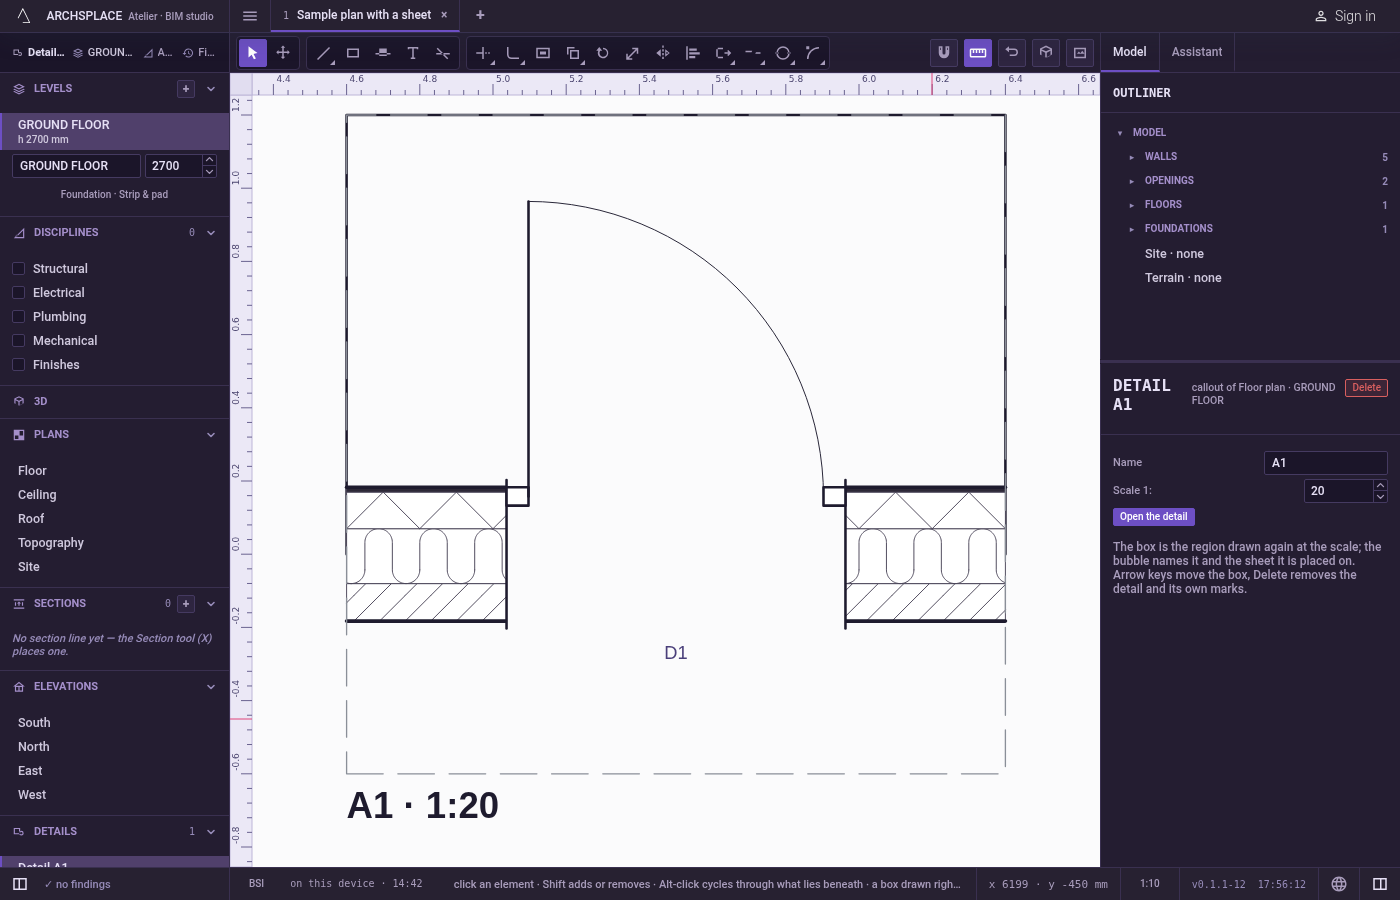
The view the callout comes from shows the region as a dashed box with a bubble at its top right corner. The bubble names the callout, D1 for the first one, D2 for the next, and under the name gives the sheet the callout is placed on, or a dash while it is on none. A click on the bubble opens the callout. The sidebar lists every callout under Details, as Detail D1, and from there it can be dragged onto a sheet, where it prints at its own scale with the caption Detail D1.
The callout's view draws the model only. The marks, the notes and the dimension chains of the view it comes from are not carried in. Inside it, the detail tools draw marks that belong to the callout alone.
When to use it
- Drawing the eaves, a threshold or a footing from a section larger, to show how it is built.
- Giving a region its own notes and lines, kept apart from the section or the elevation.
- Placing an enlarged detail on a sheet beside the drawing it comes from.
The steps
Open the view and arm the tool. Open a section, an elevation or a plan, then press
N, or click Callout, the last tool of the detail group. The status bar says to click two corners of the region to detail, and that it becomes a view of its own at 1:20.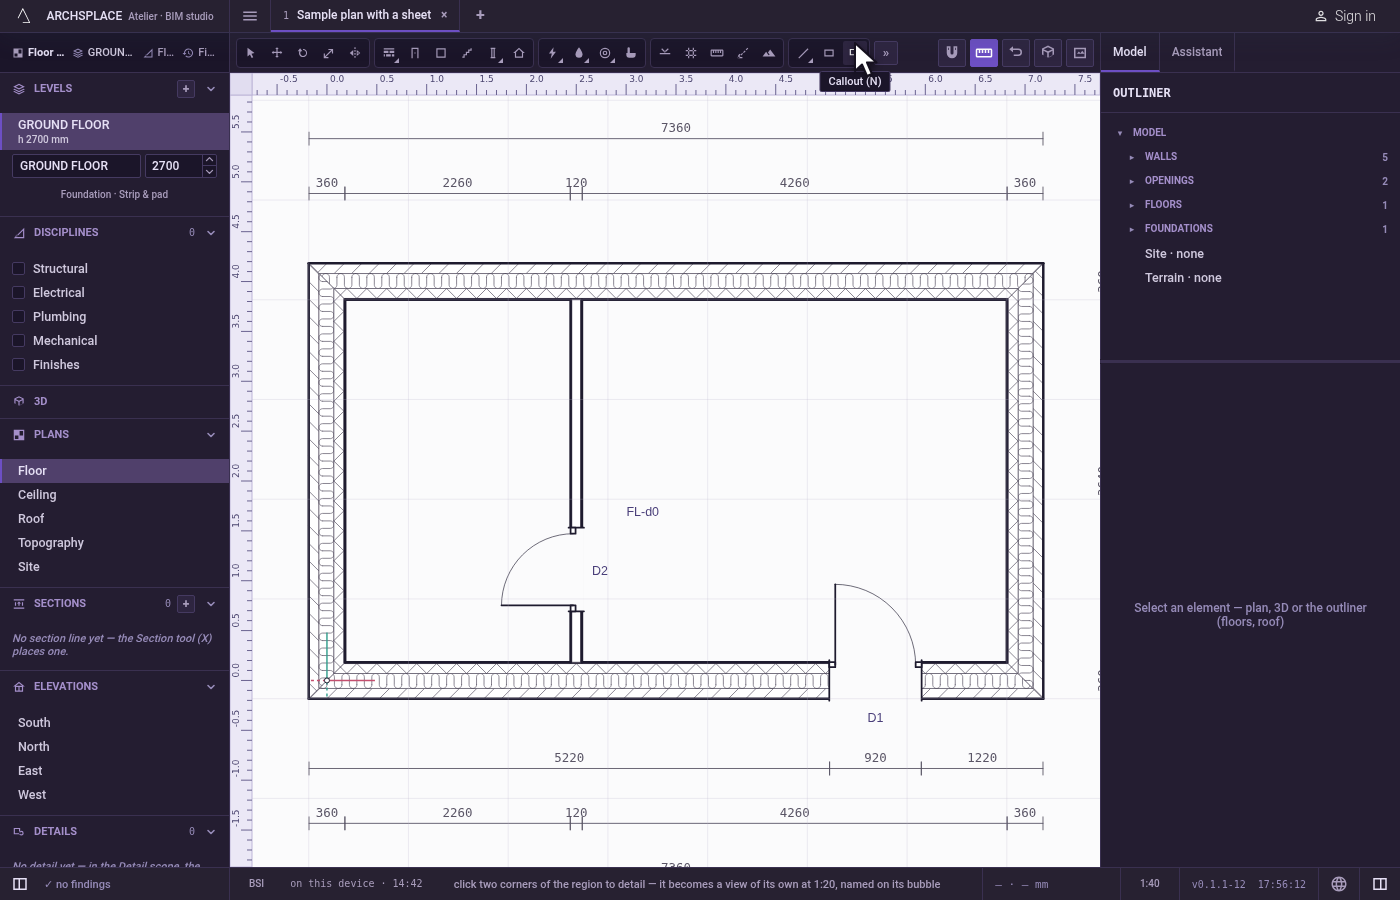
Click the first corner of the region. Every line of the drawing pulls the pointer onto its corners, middles and edges. After the click, a dashed rectangle runs from that corner to the pointer.
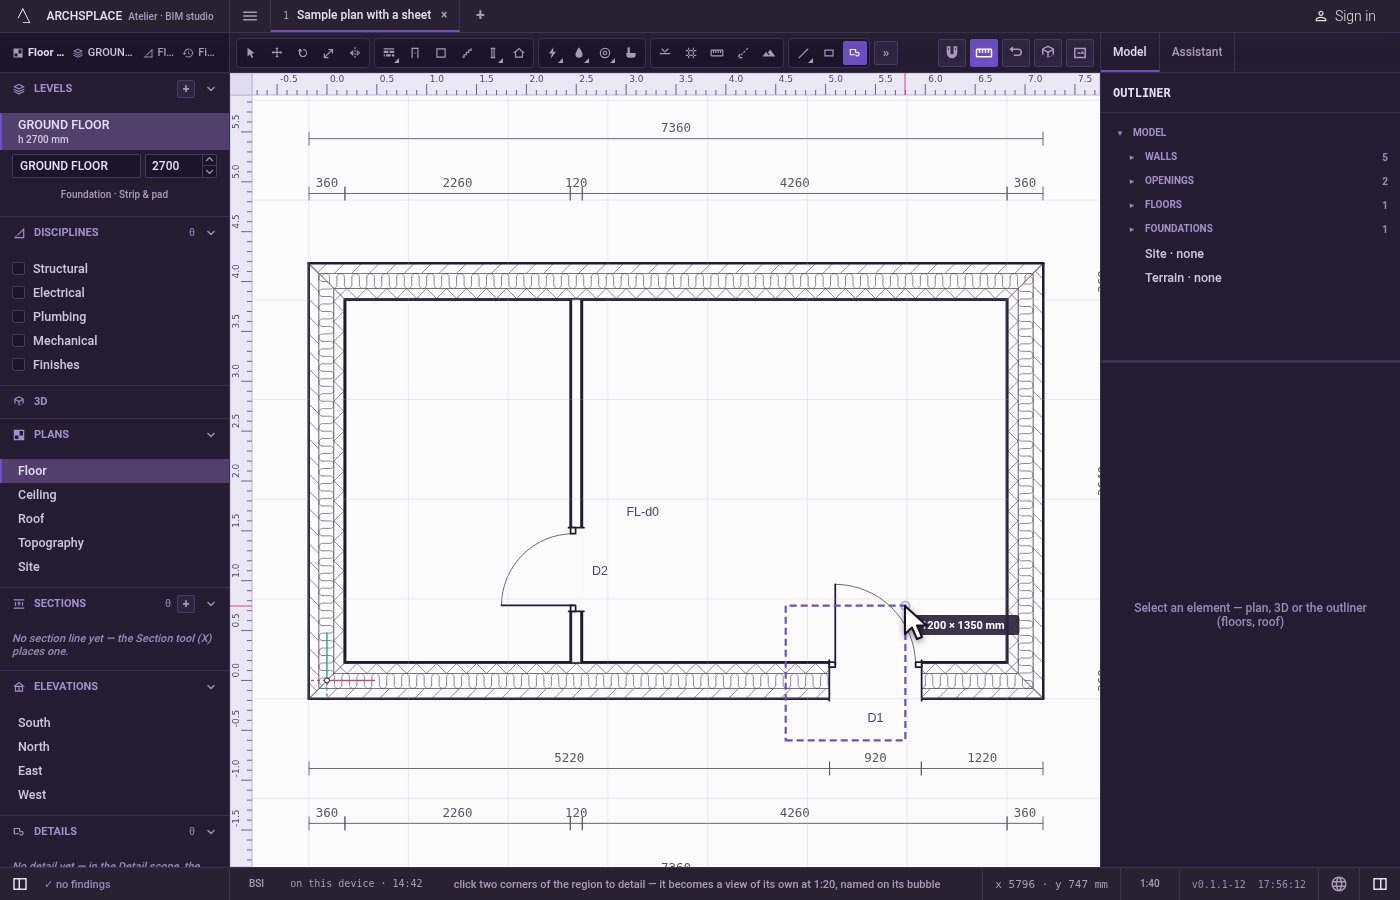
Click the opposite corner. The callout is made at once, in one step that one
Ctrl+Ztakes back. The view draws the dashed box and its bubble, and the callout is selected: its panel reads DETAIL D1 and the view it is a callout of, with the fields Name and Scale 1:, the button Open the detail, and a Delete button. The tool stays in hand for another callout.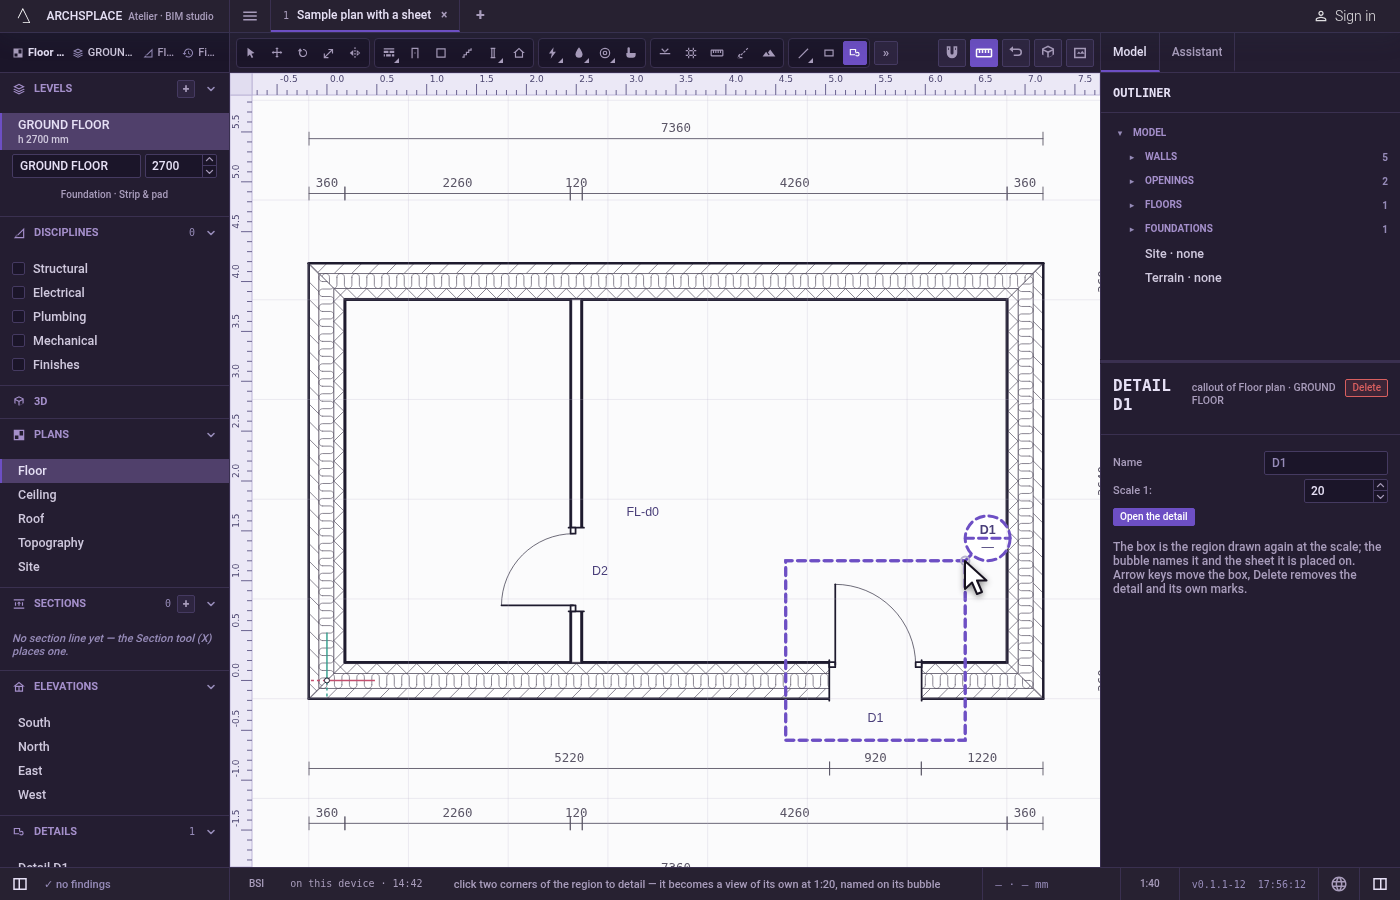
Name it and set its scale. Type a name in Name and press
Enter: the bubble, the view's title and the sidebar show it in place of D1. Scale 1: sets the scale the region is drawn at, 20 unless you type another number.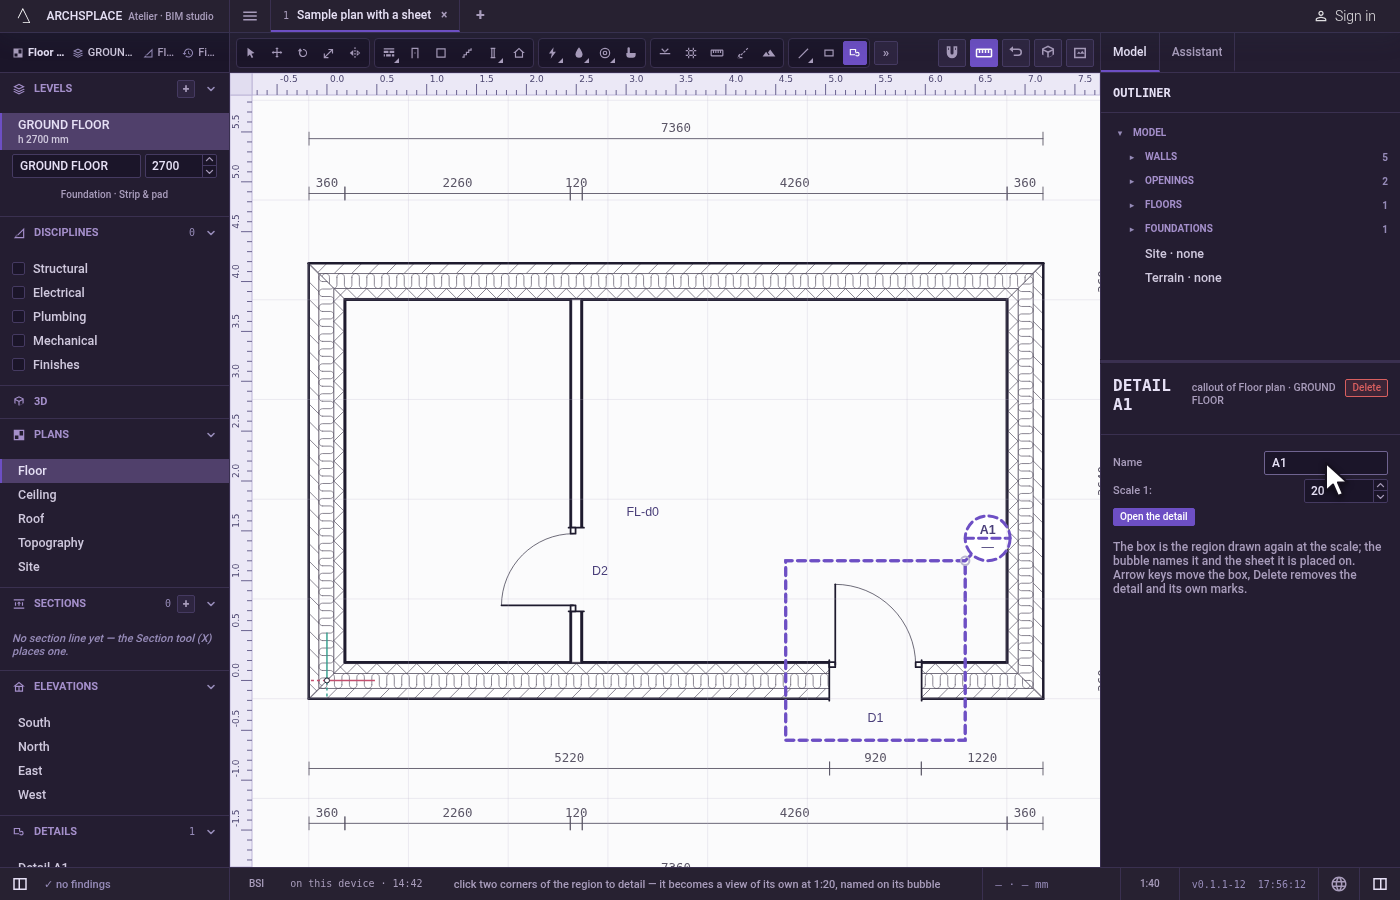
Open it. Click its bubble, click Open the detail in its panel, or click it under Details in the sidebar. The region fills the screen, drawn again at its scale, framed with a line and titled with its name and scale, such as D1 · 1:20. The toolbar now holds Select, Move and the detail tools, without Callout.
Annotate it. Press
Z, click what the arrow points at, click where the words stand, type them and pressEnter. The note belongs to the callout alone: it shows in the callout and on the sheets that place it, never on the view it comes from. Line, Rectangle, Mask and Hide work here the same way.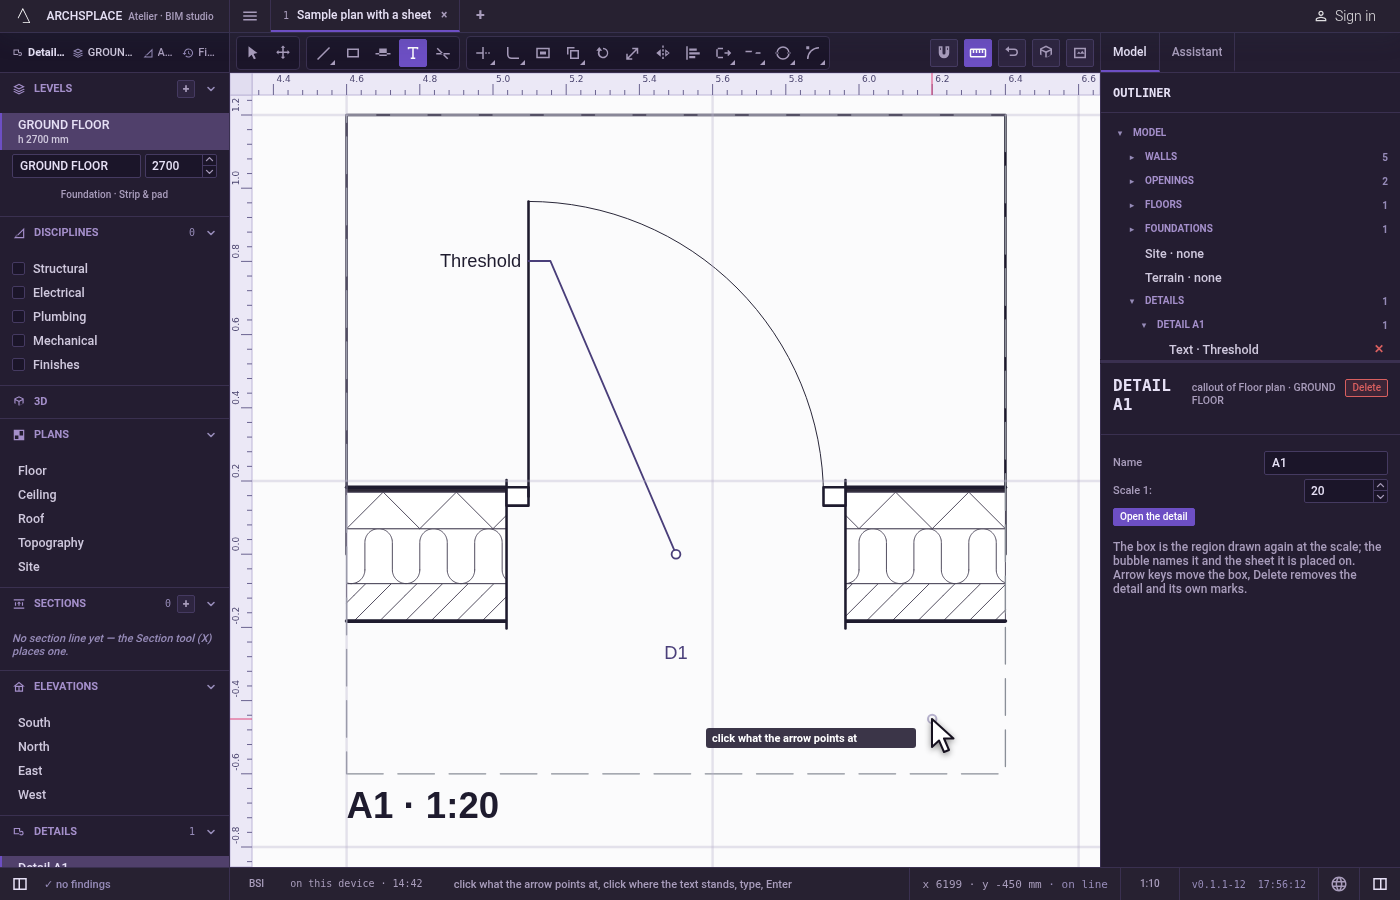
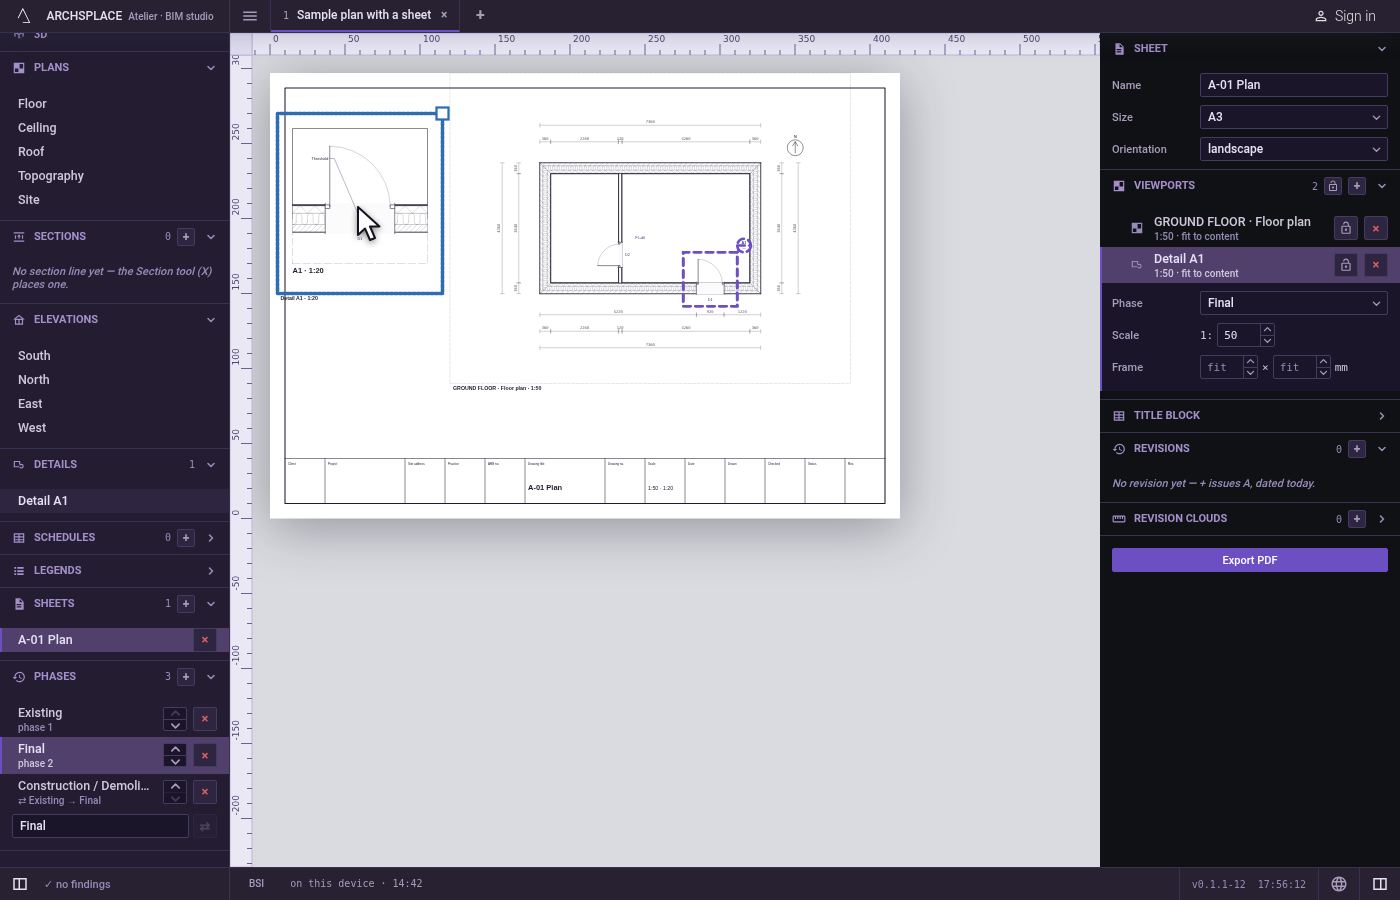
Place it on a sheet. Open a sheet, then drag Detail D1 from Details in the sidebar onto it. The sheet prints the region at the callout's scale, and the bubble on the original view now names that sheet.
What it refuses
- A callout of a callout. Inside a callout's view, the toolbar has no Callout tool. If one is asked for all the same, the studio says that a detail cannot come from another detail, and to box the region on the plan, the section or the elevation it comes from.
- A box with no width. A second corner on the same horizontal or vertical as the first, within a centimetre, boxes nothing, and the tool waits for another second corner.
- Esc before the second corner.
Escdrops the first corner and writes nothing. A secondEscputs the tool down. - Moving it with Move. Move leaves a callout where it is and says that a callout moves with the arrow keys, or is deleted and boxed again.
- Copying it. Copy says that a callout is drawn once, and to box another with the Callout tool.
- Tools with no project open. With no project open, the status bar asks you to open or create one, and the tool does nothing.
What it writes to the contract
Each callout appends one entry to the contract's callouts, the moment its second corner is clicked. It names its view the way a detail does: station for a section, by its place in stations; elevation for an elevation, by its side; level and discipline for a plan. box holds the two corners you clicked, in that view's own coordinates, rounded to the millimetre: for a section or an elevation, [u, z], along the view and up.
A name typed in the panel adds label; an empty name leaves it out, and the bubble reads D1, D2 and so on by the callout's place in the list. A scale other than 20 adds scale, as a whole number. The callout's view is never written: it is the model drawn again each time.
What is drawn inside the callout is written to details like any other mark, keyed to it by its place in callouts, in the coordinates of the view it comes from: { "kind": "TEXT", "callout": 0, "target": [4.1, 2.9], "at": [4.6, 3.4], "text": "Drip" }. With the callout selected, the arrow keys move its box, and Delete takes out its entry together with the marks drawn on it, in one step that one Ctrl+Z takes back.
Common questions
How do I draw part of a section larger?
Open the section, press N, click one corner of the region and then the opposite corner. The region becomes a view of its own at 1:20, listed under Details in the sidebar. Click its bubble on the section to open it.
Can I change the scale of a callout?
Yes. Select the callout and type another number in Scale 1: in its panel, for example 10 for 1:10. The detail is drawn again at that scale, and its title follows.
Can I make a callout inside a callout?
No. A callout's own view has no Callout tool. Box the smaller region on the plan, the section or the elevation the first callout comes from.